Ethernet Configuration in STM32CubeMX for STM32 Processor-Based Boards
To use Ethernet (TCP, UDP, or MQTT) blocks in models targeting STM32 based boards, you must configure Ethernet options using STM32CubeMX. STM32CubeMX is a configuration tool that enables you to set up peripherals and network features required for these protocols.
If you are new to STM32CubeMX tool, see https://www.st.com/en/development-tools/stm32cubemx.html
Prerequisite
Complete the following tutorials:
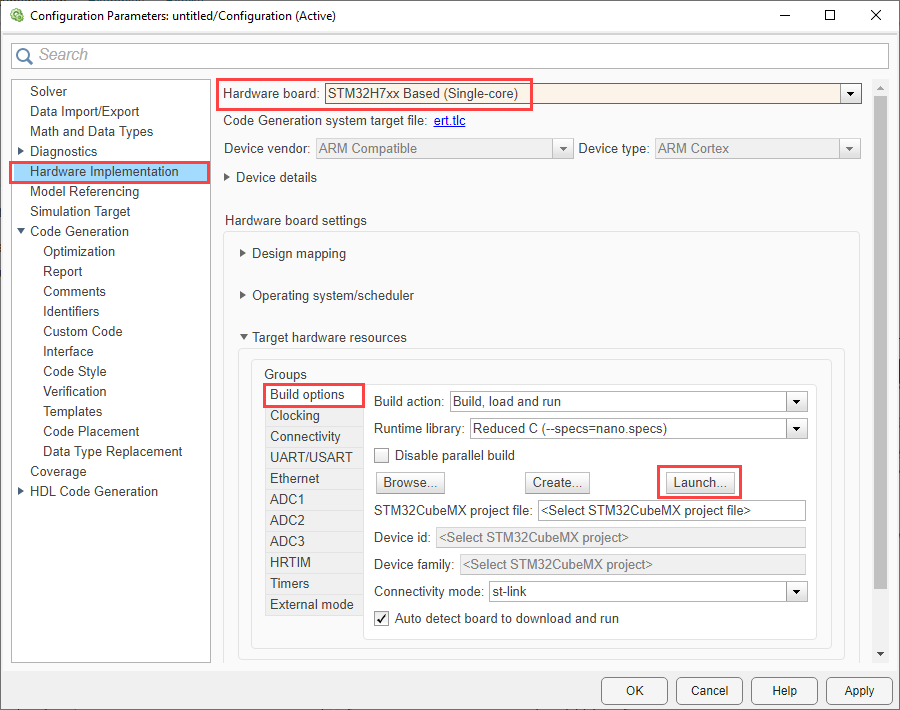
Configure STM32H7xx Based Boards
This section describes how to configure the Ethernet options in STM32CubeMX project for STM32H7xx-based boards.
Click Launch to open the selected STM32CubeMX project in STM32CubeMX tool.
In the STM32CubeMX tool, you can configure the peripherals for the selected STM32 processors.
In the STM32CubeMX tool, go to System Core > CORTEX_M7 > Parameter Settings > Cortex Interface settings and set the CPU ICache and CPU DCache to
Enabled.
Go to Connectivity > ETH > Mode and select the Mode as
RMII.Navigate to Configurations > NVIC Settings and enable the parameters Ethernet global interrupt and Ethernet wake-up interrupt through EXTI line 86.

Go to ETH > Parameters Settings > Ethernet Configuration and ensure that the Rx Buffers Address is set to
0x30040200.
For the STM32H723ZG board, ensure that the Tx Descriptor Address, Rx Descriptor Address, Rx Buffer Address, and Rx Buffer Length values are configured as shown.

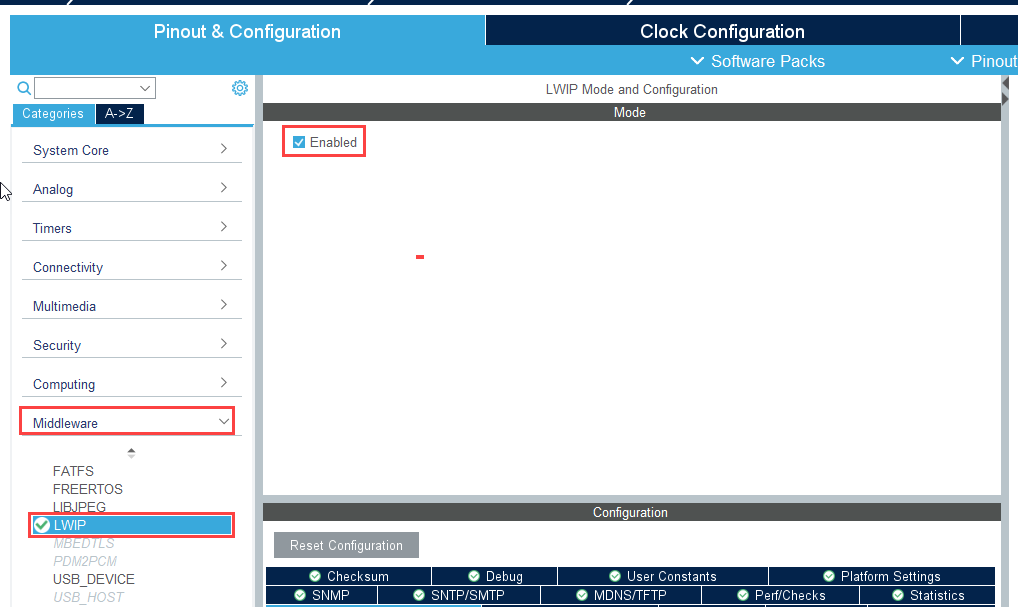
Go to Middleware > LWIP > Mode and enable the Mode.
In the Platform settings, set the Found solutions to
LAN8742.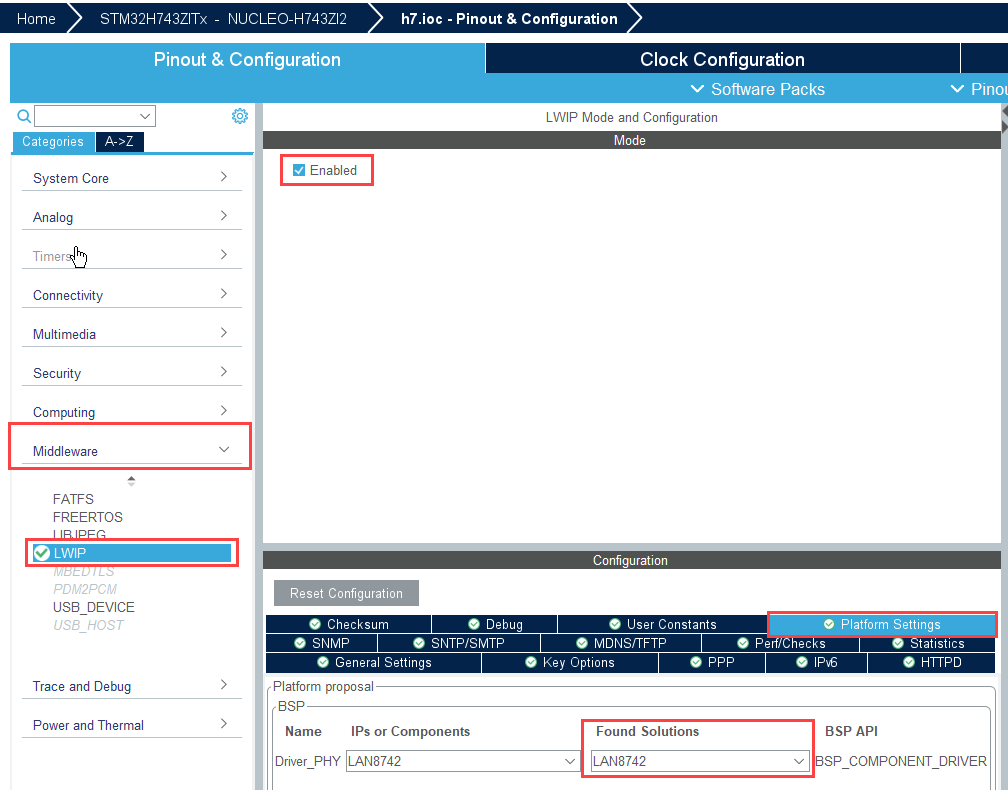
Go to File and Click Save Project.
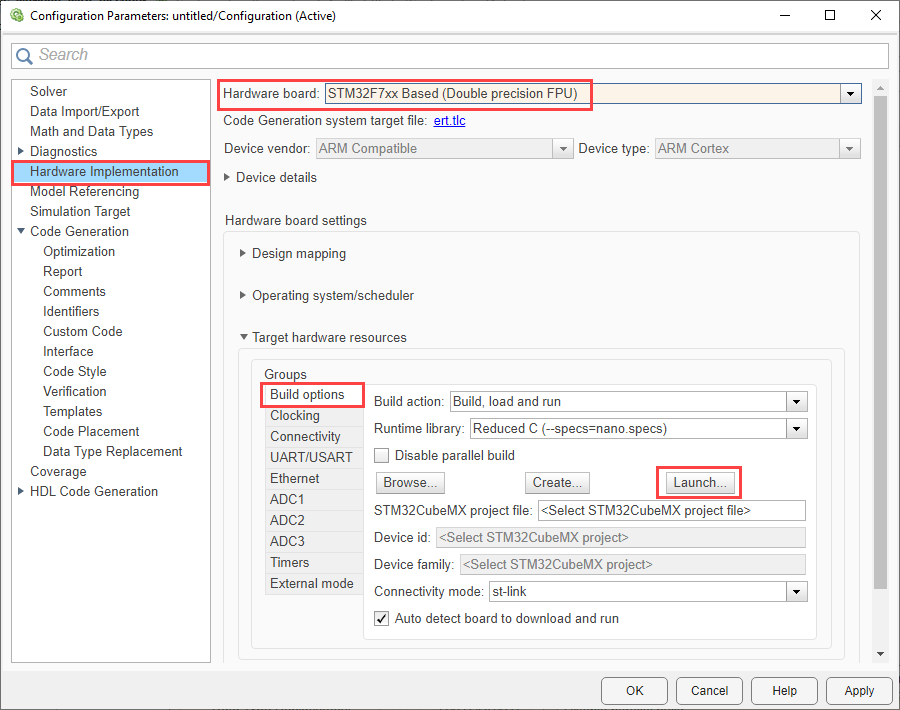
Configure STM32F7xx/STM32xx Based Boards
This section describes how to configure the Ethernet options in STM32CubeMX project for STM32F7xx or any STM32xx based boards.
Click Launch to open the selected STM32CubeMX project in STM32CubeMX tool.
Note
You can configure Ethernet options for STM32F4xx-based boards in a similar way to STM32F7xx-based boards.
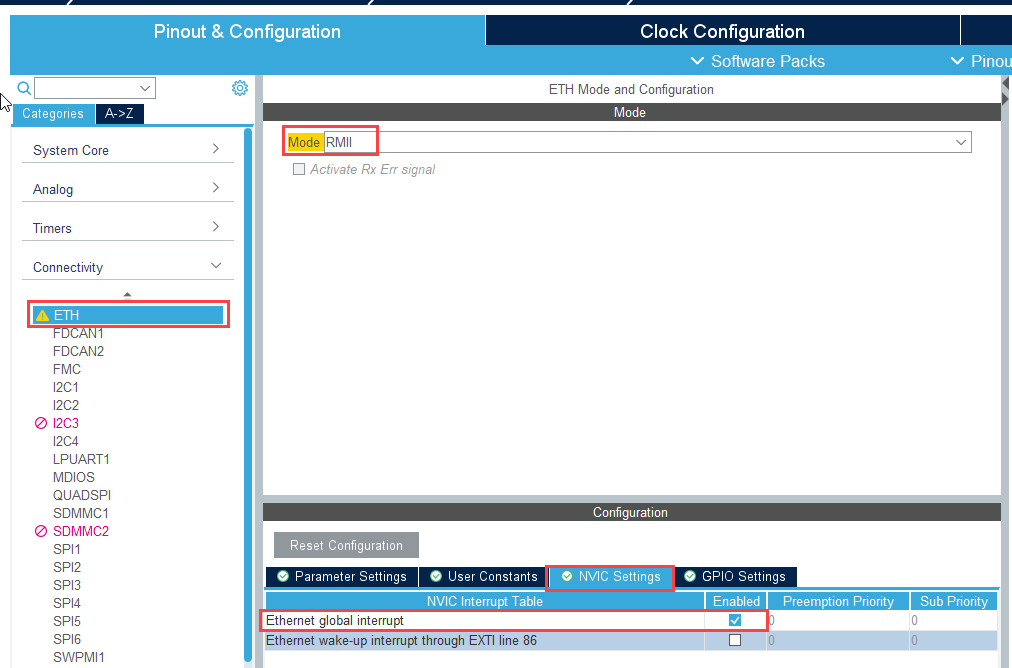
Go to Connectivity > ETH > Mode and select the Mode as
RMII.Navigate to Configurations > NVIC Settings and enable the parameter Ethernet global interrupt.
Go to Middleware > LWIP > Mode and enable the Mode.
In the Platform settings, set the Found solutions as shown.

Go to File and Click Save Project.
Configure Ethernet FreeRTOS Settings
In addition to the generic configurations mentioned above, configure these settings to enable Ethernet functionality when using FreeRTOS as the operating system.
Open the IOC file and navigate to LWIP > Key Options > Infrastructure - Heap and Memory Pools Options.
Increase the MEM_SIZE to
10*1024and set the LWIP_RAMN_HEAP_POINTER to0x30020000. Increase these values if the model contains more Ethernet blocks or requires additional memory based on complexity. Ensure the values remain within the valid range.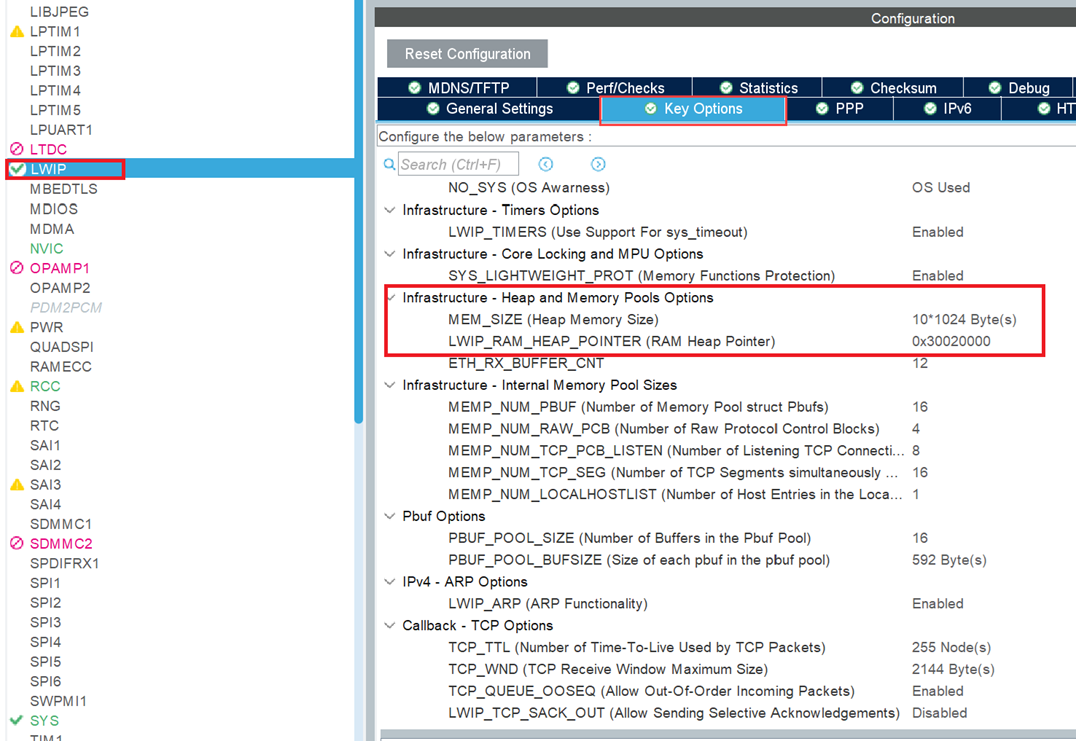
In the IOC file, select FreeRTOS. Set the Interface to
CMSIS_V2, then go to Tasks and Queues. if LWIP is enabled, a default task is automatically created. Ensure the stack size is set to 256, with the option to increase it based on application requirements.
Go to Config Parameters and set TOTAL_HEAP_SIZE to
30,720. Adjust the heap size as needed based on application requirements.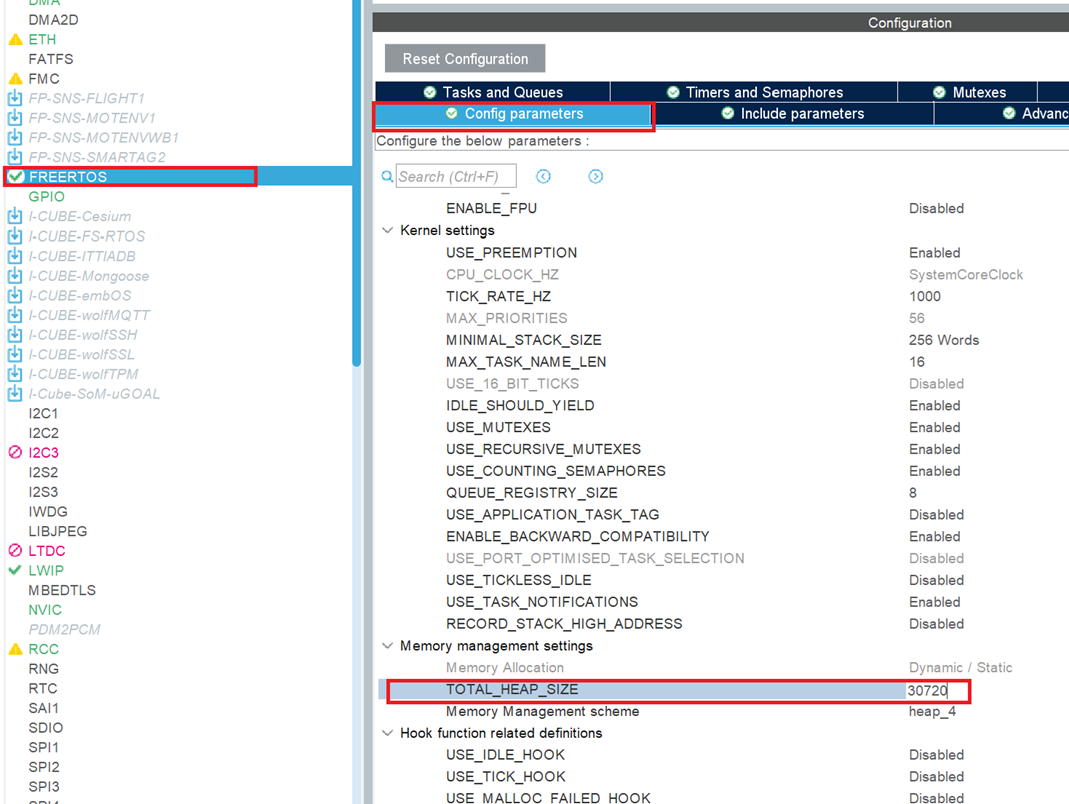
See Also
Configure STM32CubeMX with Simulink | TCP Receive | TCP Send | UDP Receive | UDP Send | Ethernet