Create a Custom Mask Dialog Box with Controls and Containers
R2026bThis example shows how to create a custom mask dialog box with parameter, display, and action controls organized in containers. In this example, you create:
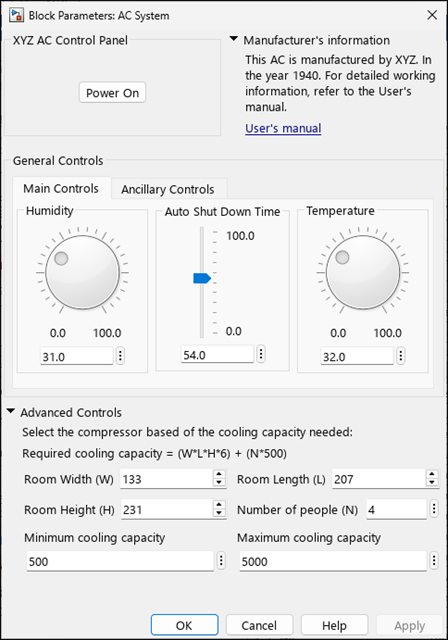
Input controls such as check boxes, radio buttons, pop-up lists, edit fields, and sliders
Action controls such as text, buttons, and hyperlinks, including callback codes
Containers such as tabs and panels that group related controls
Explore the Model
The model slexMaskACSystemExample contains a masked subsystem named AC System that implements an air conditioning (AC) system.
 model = "slexMaskACSystemExample";
 open_system(model);
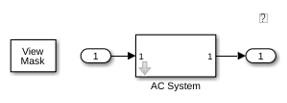
To open the Mask Editor, right-click the AC System block, and then select Mask > Edit Mask. You can also press Ctrl+M (command+M on macOS).
Add Parameter Controls
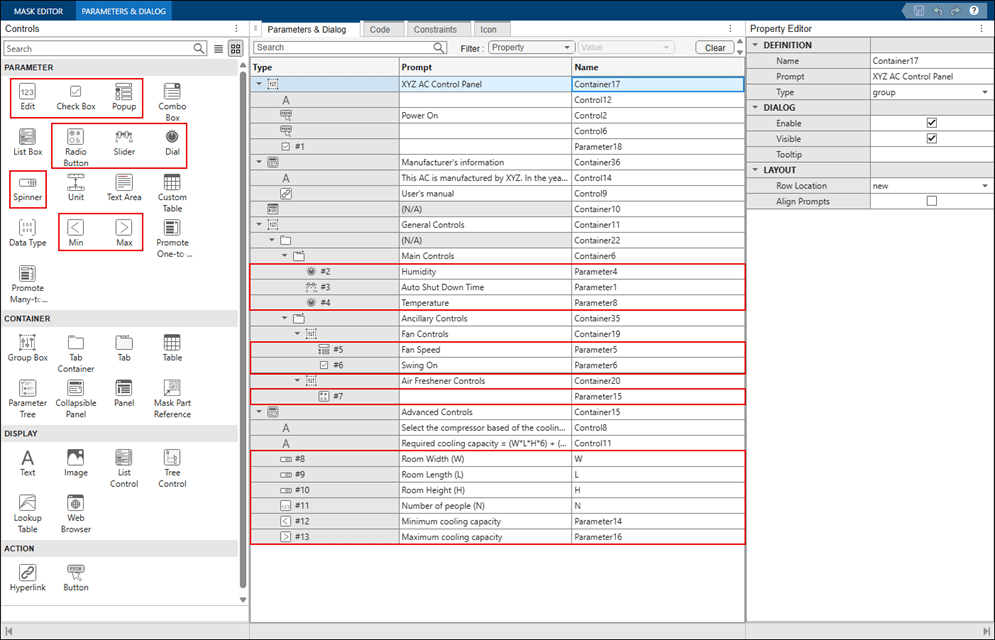
Parameter controls enable you to enter or modify values in a mask dialog box. In the Mask Editor, add parameter controls from the Parameters & Dialog pane. Use the Property Editor section and update the Prompt and Name values to configure the control properties and layout.
To configure the AC system, add these parameter controls:
Check Box — Enable or disable swing mode.
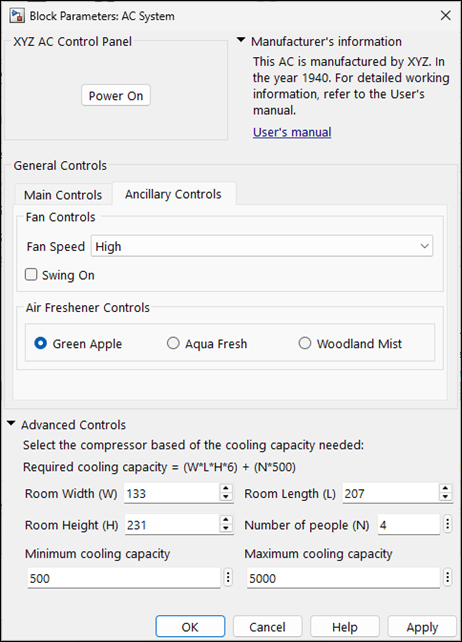
Radio Button — Choose an air freshener type.
Popup — Select a fan speed from a drop-down list.
Edit — Enter the number of people for cooling capacity calculation.
Slider/Dial/Spinner — Set humidity or temperature within a defined range.
Minimum/Maximum Values — Restrict the allowable cooling capacity range.
Add Display and Action Controls
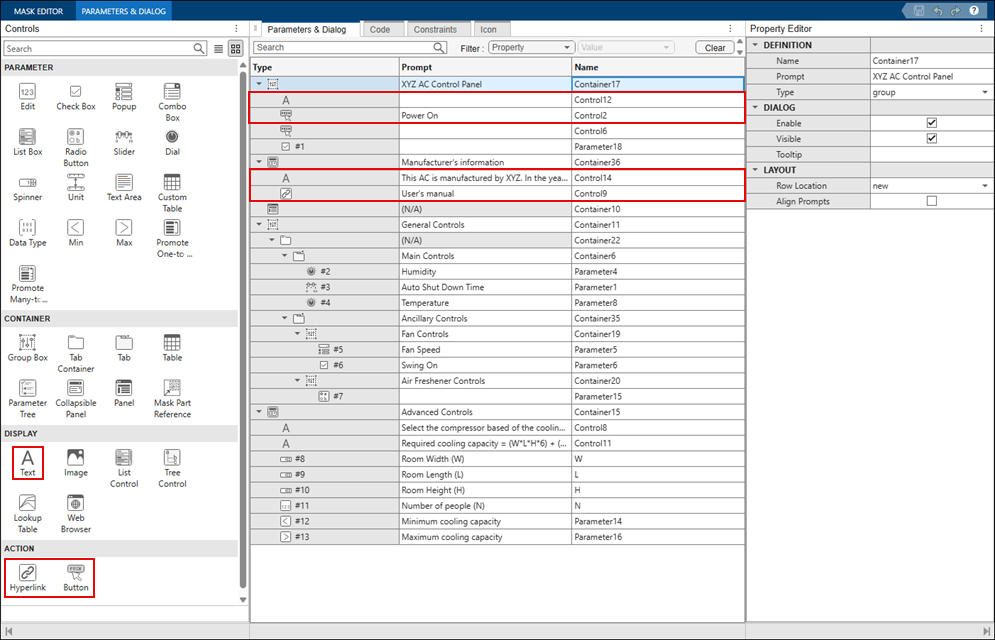
Use display and action controls to present information and perform interactive actions in a mask dialog box. Add these controls to the AC system mask dialog box:
Text — Display AC usage instructions, notes, or manufacturer information.
Hyperlink — Open related AC documentation or supported resources.
Button — Turn the AC system on or run another control action. Add callback code to define the action when the user clicks the button.
Add Callbacks to Control Behavior
Add this callback code to a masked block to show how callbacks can control mask behavior at run time. In the callback code of this example:
The initialization code updates a mask control based on the value of
Parameter1.The callback
Control2_callbacktoggles the AC power state stored inParameter18and changes the button label betweenPower OnandPower Off.The callback
Control9_callbackopens a web page.
function initialization()
if Parameter1 >= 50
    set_param(gcb,'Parameter6', 'Off')
end

end

% Callback for Control2
function Control2_callback()
aMaskObj = Simulink.Mask.get(gcbh);
aPowerButtonControl = aMaskObj.getDialogControl('Control2');
aPowerControl = get_param(gcbh, 'Parameter18');
if strcmp(aPowerControl, 'on')
    aPowerButtonControl.Prompt = 'Power Off';
    set_param(gcbh, 'Parameter18', 'off');
else
    aPowerButtonControl.Prompt = 'Power On';
    set_param(gcbh, 'Parameter18', 'on');
end

end

% Callback for Control9
function Control9_callback()
web('www.mathworks.com')
end
Organize Controls Using Containers
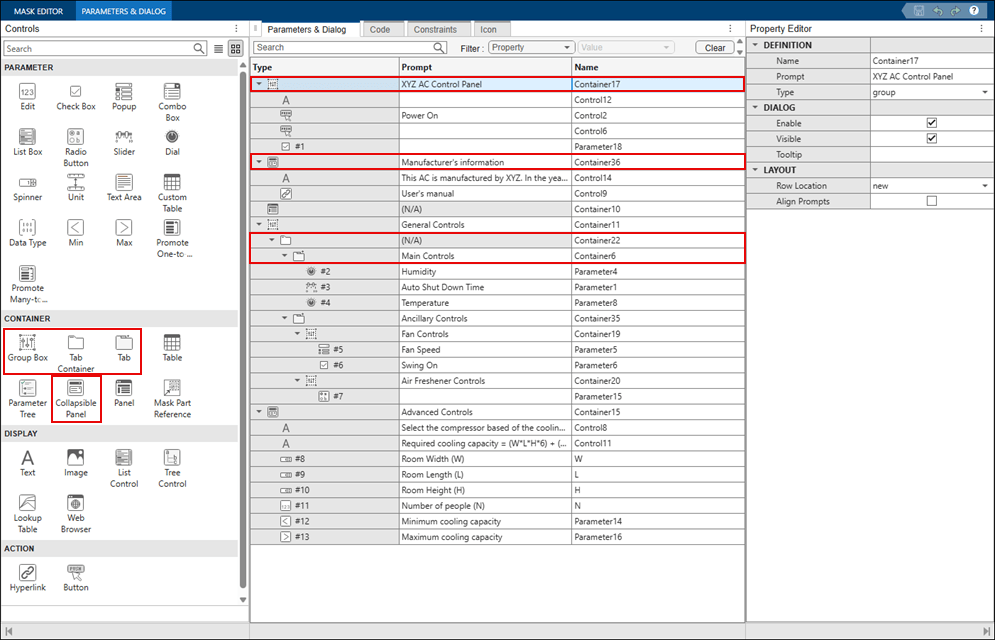
To organize the mask, use these controls to group related elements. When you select a control and add a container, the container appears at that position and groups the controls beneath it.
Collapsible Panel — Group related AC controls in an expandable section. For example, place manufacturer details in a panel with the prompt '
Manufacturer's Information'.Group Box — Organize related AC settings, such as general settings or control panel options, within a bordered section.
Tab Container — Organize AC controls into multiple sections. For example, add a tab container and create two tabs:
Main Controlsfor primary AC parameters andAncillary Controlsfor additional features.
Preview and Save
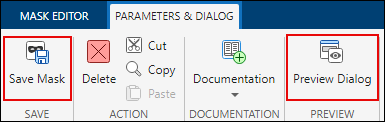
To view the mask dialog box as you build it, click Preview Dialog. To save the mask, click Save Mask.
The created AC mask dialog box uses panels and tabs to organize related controls. Separate sections group power, manufacturer information, general controls, and advanced controls, while tabs divide primary controls from ancillary controls.