Specify Parallel Computing Toolbox Profile in .NET Application
This example shows how to use the MATLAB® Runtime User Data Interface to specify the profile of a Parallel Computing Toolbox™ cluster in a .NET application.
For more details, see Using MATLAB Runtime User Data Interface.
Step 1: Write Parallel Computing Toolbox Code
Create
sample_pct.min MATLAB.This example code uses the cluster defined in the default profile for Parallel Computing Toolbox.
function speedup = sample_pct (n)
warning off all;
tic
if(ischar(n))
    n=str2double(n);
end
for ii = 1:n
   (cov(sin(magic(n)+rand(n,n))));
end
time1 =toc;
parpool;
tic
parfor ii = 1:n
   (cov(sin(magic(n)+rand(n,n))));
end
time2 =toc;
disp(['Normal loop time: ' num2str(time1) ...
    ', parallel loop time: ' num2str(time2) ]);
disp(['parallel speedup: ' num2str(1/(time2/time1)) ...
    ' times faster than normal']);
delete(gcp);
disp('done');
speedup = (time1/time2);
Run the function with the input
400.a = sample_pct(400)
The following is an example of the output, assuming the default profile is set to
local:Starting parallel pool (parpool) using the 'local' profile ... Connected to the parallel pool (number of workers: 6). Normal loop time: 2.5651, parallel loop time: 1.6371 parallel speedup: 1.5668 times faster than normal Parallel pool using the 'local' profile is shutting down. done ans = 1.5668
Step 2: Set Parallel Computing Toolbox Profile
To access the MATLAB Runtime User Data interface using a .NET component built with MATLAB
Compiler SDK™, you must set mcruserdata directly from MATLAB. There is no Java® API to access mcruserdata as there is for C and C++
applications built with MATLAB
Compiler SDK.
To set the mcruserdata from MATLAB, create an init function. This separate MATLAB function uses setmcruserdata to set the
Parallel Computing Toolbox profile once. You then call your other functions to utilize the Parallel Computing Toolbox.
Create the following init_sample_pct function:
function init_sample_pct
% Set the Parallel Computing Toolbox Profile:
if(isdeployed)
    % Let the USER select the cluster profile.
    [profile, profpath] = uigetfile('*.mlsettings');
    setmcruserdata('ParallelProfile', fullfile(profpath, profile));
end
To export an existing profile to an .mlsettings file, use the
parallel.exportProfile (Parallel Computing Toolbox) function. For
example,
parallel.exportProfile('local','mylocalsettings');
Tip
If you need to change your profile in the application, use parallel.importProfile (Parallel Computing Toolbox) and parallel.defaultClusterProfile (Parallel Computing Toolbox). For more information, see Discover Clusters and Use Cluster Profiles (Parallel Computing Toolbox).
Step 3: Compile Your Function
Build the .NET component with the .NET Assembly Compiler app or compiler.build.dotNETAssembly using the following information:
| Field | Value |
|---|---|
| Library Name | netPctComp |
| Class Name | NetPctClass |
| Files to Compile | sample_pct.m and
init_sample_pct.m |
For example, if you are using compiler.build.dotNETAssembly,
type:
buildResults = compiler.build.dotNETAssembly( ...
{'sample_pct.m','init_sample_pct.m'}, ...
'AssemblyName','netPctComp', ...
'ClassName','NetPctClass');
For more details, see the instructions in Generate MWArray .NET Assembly and Build .NET Application.
Note
If you are using the GPU feature of Parallel Computing Toolbox, you must manually add the PTX and CU files.
If you are using a Compiler app, click Add file in the Custom Requirements section.
If you are using a
compiler.buildfunction, use theAdditionalFilesoption.If you are using the
mcccommand, use the-aoption.
Step 4: Build and Run .NET Application
Open Microsoft®
Visual Studio® and create a C# Console App called
DotNETPCT.
Write source code for a .NET application that accesses the MATLAB functions.
A sample C# application for this example is provided below.
using System;
using MathWorks.MATLAB.NET.Utility;
using MathWorks.MATLAB.NET.Arrays;
using netPctComp;
namespace PctNet
{
    class Program
    {
        static void Main(string[] args)
        {
            try
            {
                NetPctClass A = new NetPctClass();
                // Initialize the PCT setup
                A.init_sample_pct();
                double var = 400;
                MWNumericArray out1;
                MWNumericArray in1 = new MWNumericArray(var);
                out1 = (MWNumericArray)A.sample_pct(in1);
                Console.WriteLine("The speedup is {0}", out1);
                Console.ReadLine();
                        // Wait for user to exit application
            }
            catch (Exception exception)
            {
                Console.WriteLine("Error: {0}", exception);
            }

        }
    }
}
Note
This example code was written using Microsoft Visual Studio 2019.
In Visual Studio, add a reference to your assembly file netPctComp.dll
located in the folder where you generated or installed the assembly.
Add a reference to the MWArray API.
| If MATLAB is installed on your system | |
| If MATLAB Runtime is installed on your system | |
Build and run the DotNETPCT application in Visual Studio.
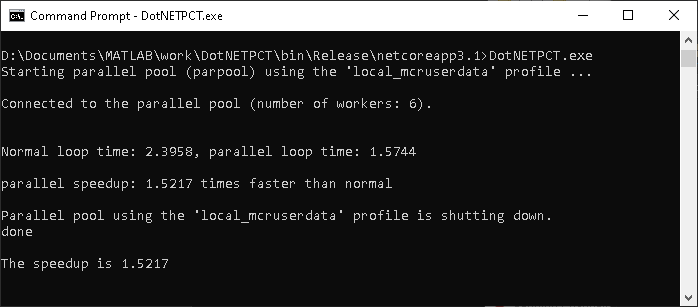
The DotNETPCT application prompts you to select the cluster profile
to use. After you select the .mlsettings file, the application displays
output similar to the following:
See Also
getmcruserdata | setmcruserdata
Topics
- Using MATLAB Runtime User Data Interface
- Discover Clusters and Use Cluster Profiles (Parallel Computing Toolbox)