Switching Between ROS Middleware Implementations
R2026bROS 2 is based on the Data Distribution Service (DDS™) standard, an end-to-end middleware protocol that provides features such as discovery, serialization, and transportation. ROS 2 supports multiple ROS middleware (RMW) implementations so that you can choose one that best suits your requirements. Use these factors to inform your choice of middleware implementation: platform availability, performance characteristics, computation footprint, dependencies, and license.
You can switch between RMW implementations for using DDS while working with ROS 2 in MATLAB® and Simulink®, from ROS Toolbox Preferences. ROS Toolbox contains these RMW implementations.
rmw_fastrtps_cpp— eProsima Fast DDS (Version 2.14.5). This is the default RMW implementation.rmw_fastrtps_dynamic_cpp— eProsima Fast DDS.rmw_cyclonedds_cpp— Eclipse Cyclone DDS (Version 0.10.5).
You can also configure and switch to these custom RMW implementations.
rmw_connextdds— RTI Connext DDS (version 6.0.1 or later). This implementation is supported on Windows®, Linux®, and macOS operating systems.rmw_zenoh_cpp— Eclipse Zenoh Middleware. Zenoh is a high-performance, low-latency communication protocol optimized for distributed and heterogeneous environments. This implementation is supported on Windows®, Linux®, and macOS operating systems.rmw_iceoryx_cpp— Eclipse Iceoryx Middleware (version 2.0.3). This implementation is supported on Linux and macOS operating systems.
Additionally, you can also switch to other custom RMW implementations based on dynamic or static introspection type support in ROS 2.
Note: When generating code in macOS operating system, using rmw_fastrtps_cpp as the RMW implementation is recommended for enhanced stability.
For the latest supported versions of Python, see ROS Toolbox System Requirements.
Video Walkthrough
For a walkthrough of the example, play the video.
Configure RMW Implementations Shipped with ROS Toolbox
1. In the Environment section of the Home tab in the MATLAB toolstrip, click Settings and select ROS Toolbox.
2. Specify the path to the Python executable, and click Recreate Python Environment. If you have configured Python already, proceed with the next step.
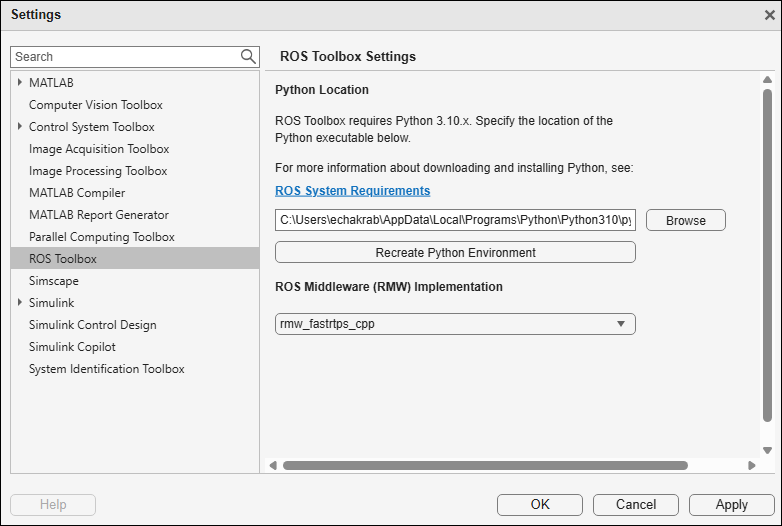
3. Open the dropdown list under ROS Middleware (RMW) Implementation to switch between RMW implementations. Select an implementation from the list and click Apply and then OK. This enables you to create a ROS 2 node with the selected implementation.
Configure Custom RMW Implementations
To configure a custom RMW implementation, open the ROS Toolbox Settings window using the above steps and create the Python environment. Select Configure and Switch to Custom RMW Implementation in the dropdown list under ROS Middleware (RMW) Implementation to launch the ROS Middleware Configuration dialog box.
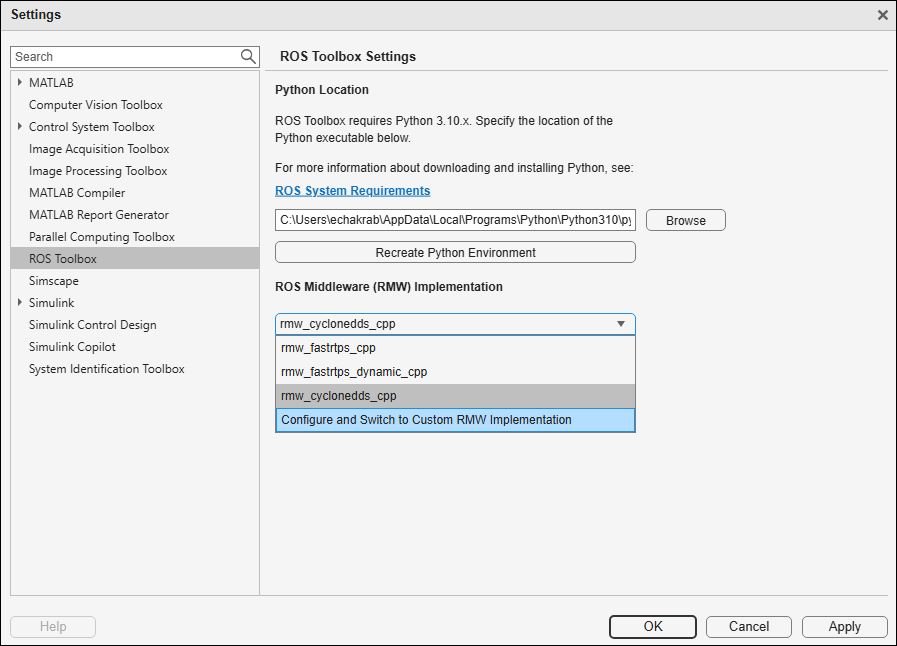
The dialog presents the available custom RMW options:
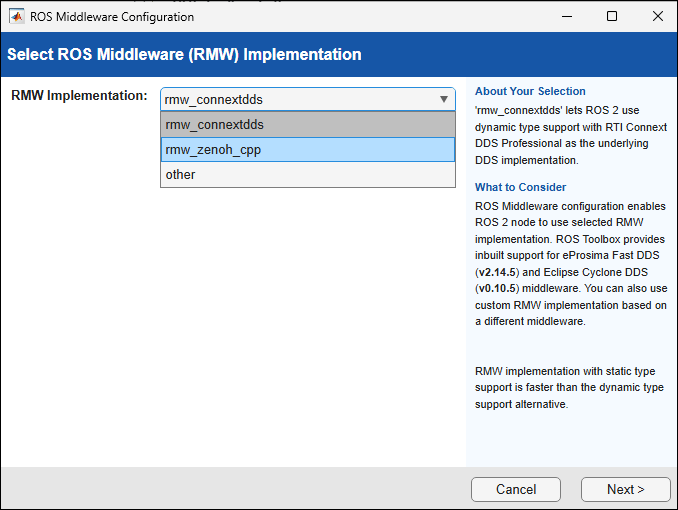
rmw_connextddsrmw_zenoh_cppother
Configure RTI Connext DDS (rmw_connextdds)
1. Select rmw_connextdds from the RMW Implementation dropdown menu in the ROS Middleware Configuration dialog box and click Next.
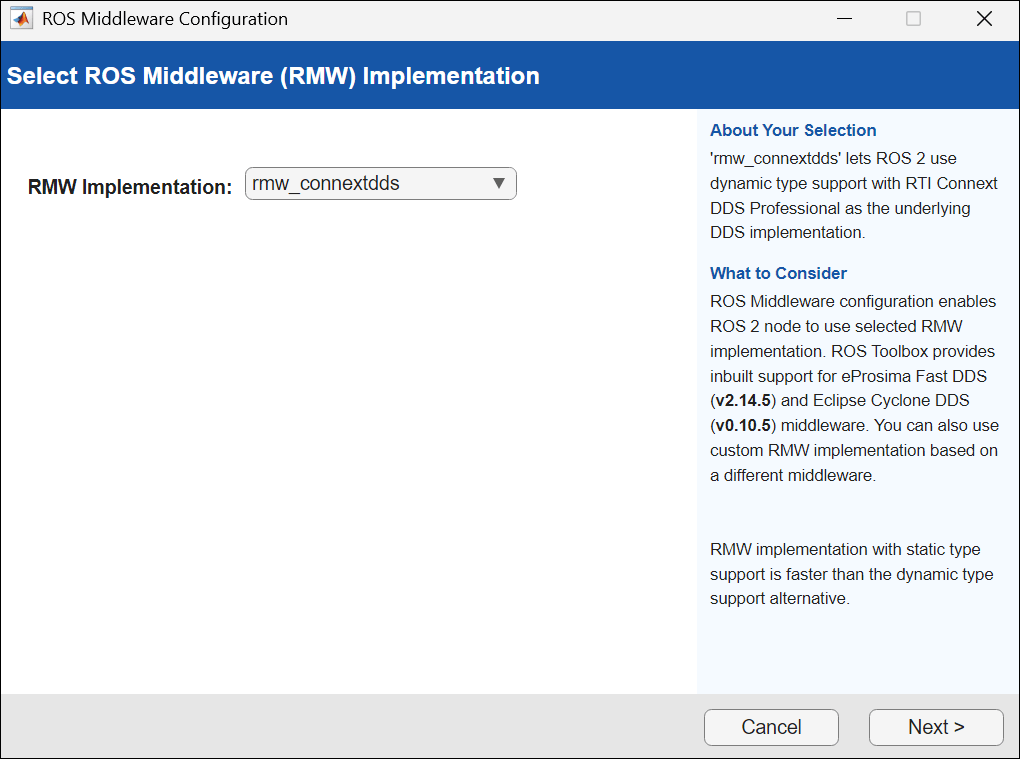
2. Verify the underlying DDS installation (RTI Connext DDS) by clicking Verify Installation. For more information, see the links in the Validate DDS Installation window.
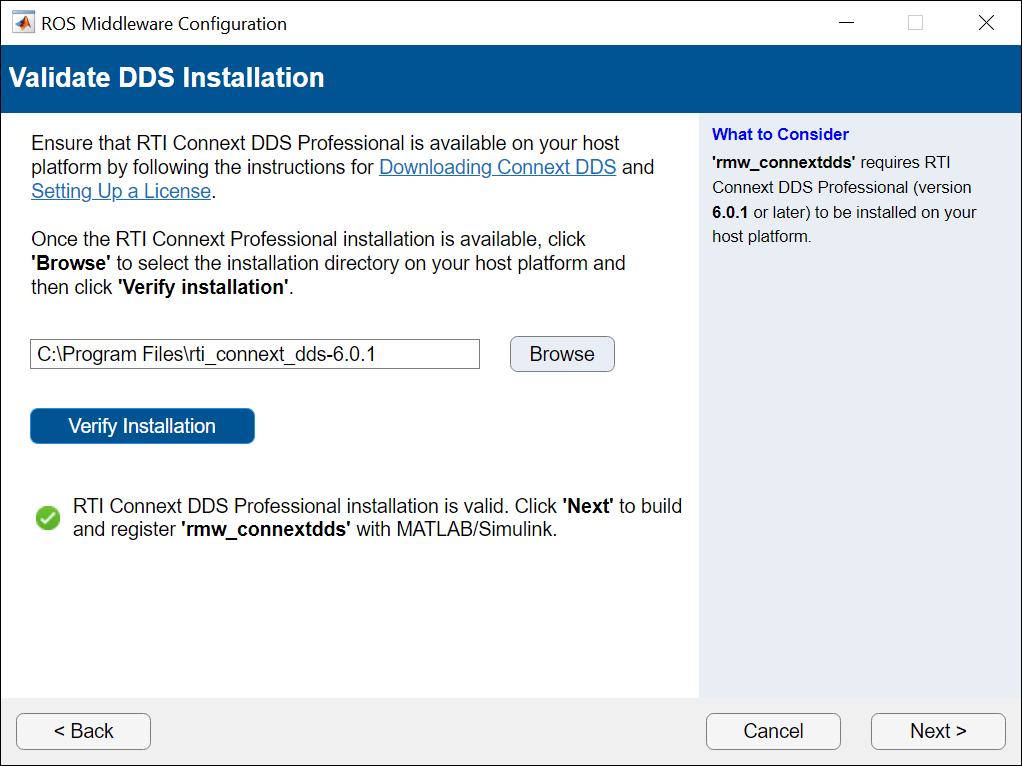
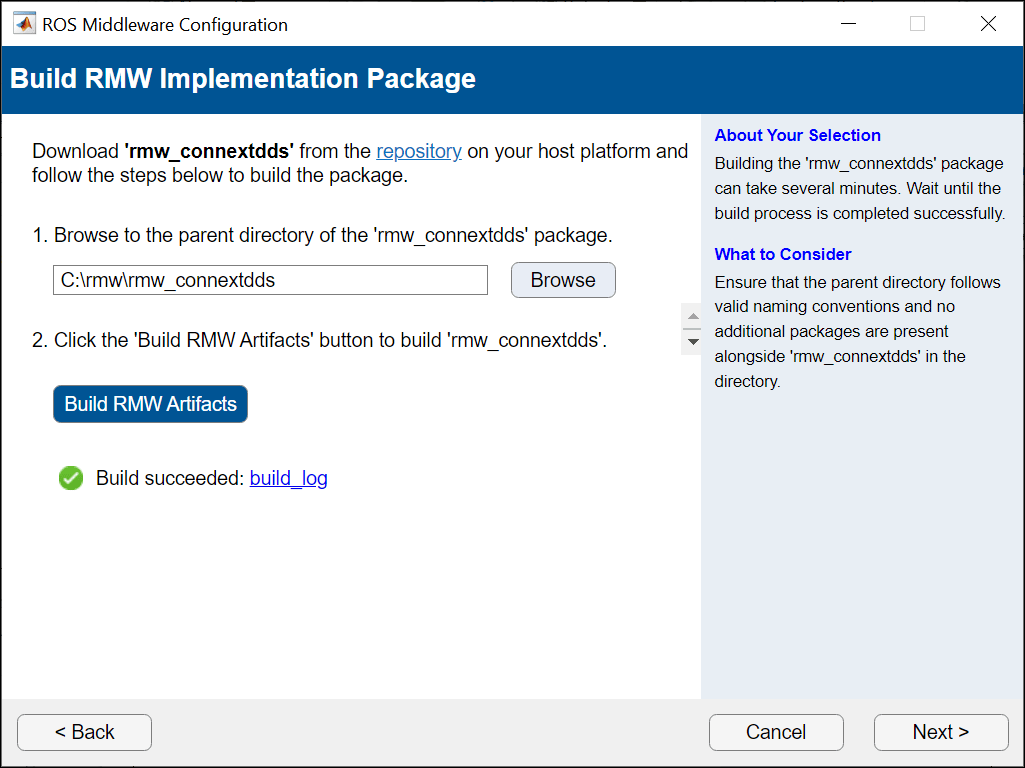
3. Click Browse and navigate to the parent directory of the DDS package. Build the RMW implementation package by clicking Build RMW Artifacts and then click Next if the build is successful.
4. Click Test RMW to validate if ROS 2 node creation is successful with the custom RMW implementation set to rmw_connextdds.
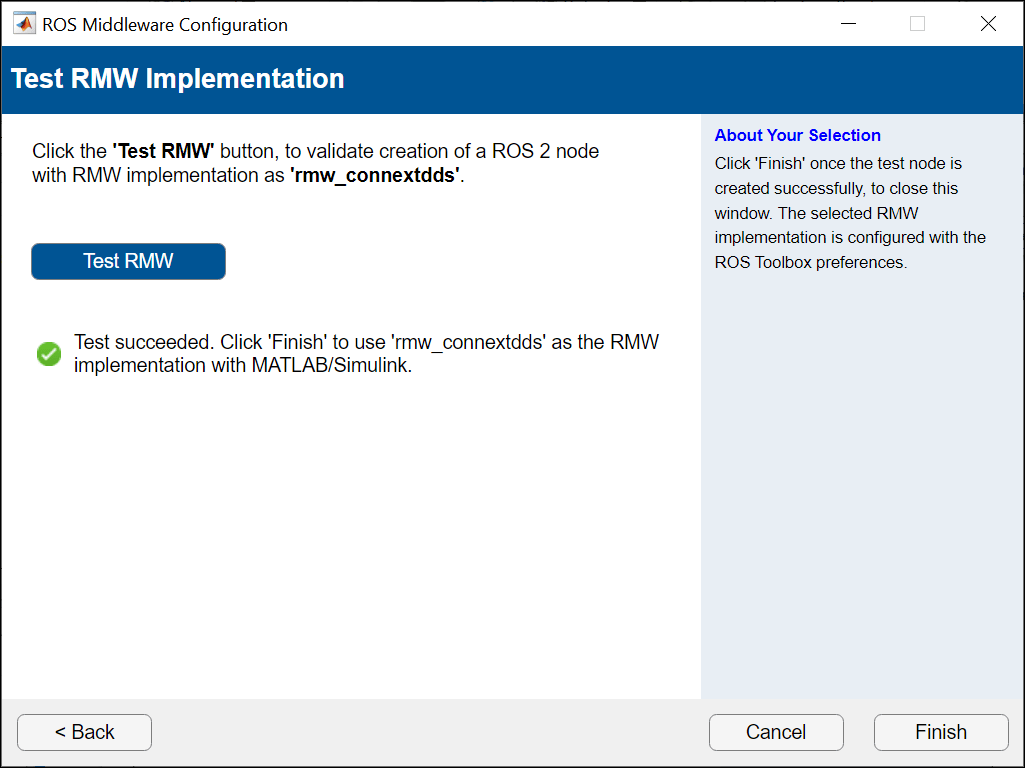
5. The selected ROS Middleware (RMW) Implementation is now registered as default in the dropdown menu in the ROS Toolbox Settings window. Click OK to set this RMW implementation.
Configure Eclipse Zenoh (rmw_zenoh_cpp)
1. Select rmw_zenoh_cpp from the RMW Implementation dropdown menu in the ROS Middleware Configuration dialog box and click Next.
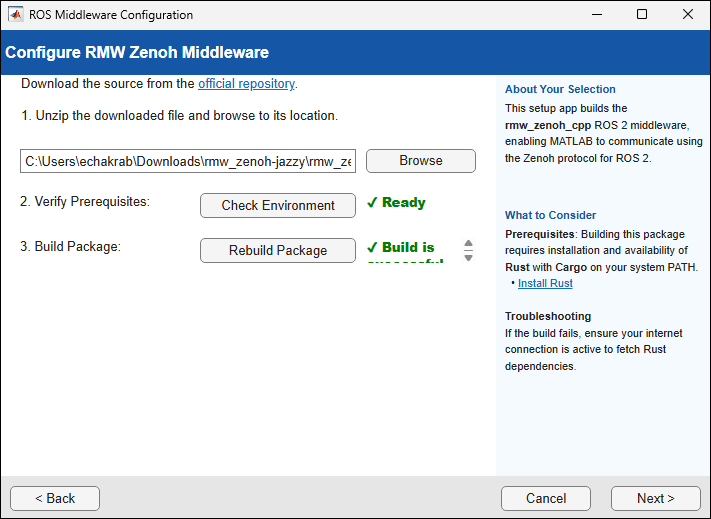
2. In the Configure RMW Zenoh Middleware screen, download the source from the official repository. Unzip the downloaded file and click Browse to navigate to its location.
3. Click Check Environment to verify prerequisites. Building the Zenoh package requires installation and availability of Rust with Cargo on your system PATH. If the build fails, ensure your internet connection is active to fetch Rust dependencies.
4. Click Build Package to build the rmw_zenoh_cpp middleware package and once build is successful, click Next. If the build fails, ensure your internet connection is active so it can fetch the Rust dependencies, then click Rebuild Package.
5. In the Configure Zenoh Connection Mode window, select the required Zenoh topology for your environment:
Client: Nodes require an external router for discovery. This is recommended for WAN, NAT, cloud, or firewalled lab environments. Enter the router endpoint (default:
tcp/localhost:7447).Peer-to-Peer: Nodes do not need a router for discovery. This is suitable for local LAN setups.
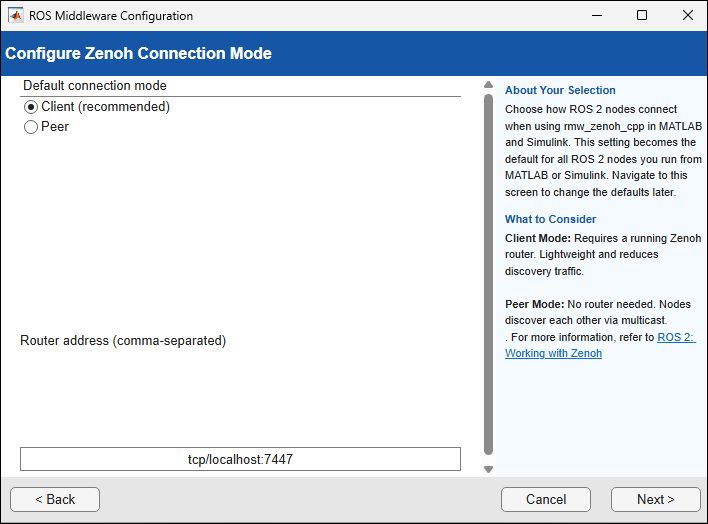
6. Click Next and then click Test RMW to validate if ROS 2 node creation is successful with the custom RMW implementation set to rmw_zenoh_cpp.
7. The selected ROS Middleware (RMW) Implementation is now registered as default in the dropdown menu in the ROS Toolbox Settings window. Click OK to set this RMW implementation.
Configure Other RMW Implementations Based on Dynamic or Static Introspection Type Support
1. Select other in the dropdown within the ROS Middleware Configuration dialog box to provide the folder path containing one or multiple RMW implementations, based on dynamic or static introspection type support. Click Next and proceed to validate their existence in the location. Providing the folder path to a particular RMW implementation enables you to proceed with its configuration.
2. If the folder contains multiple RMW implementations, you can choose one or all from the dropdown in the subsequent interface. Click Next upon making the selection.
Note: Building RMW implementation based on static type support requires static ROS IDL type support package for serialization and deserialization of ROS 2 messages.
3. Provide the parent path to middleware installation and set the environment variables required to build the RMW implementation package or packages. Follow subsequent steps as earlier to build the RMW implementation package.
4. Additionally, build the ROS 2 message packages and custom messages by clicking Build Message Artifacts, to create ROS 2 node and work with ROS 2 APIs or Simulink Blocks on the selected RMW implementation.
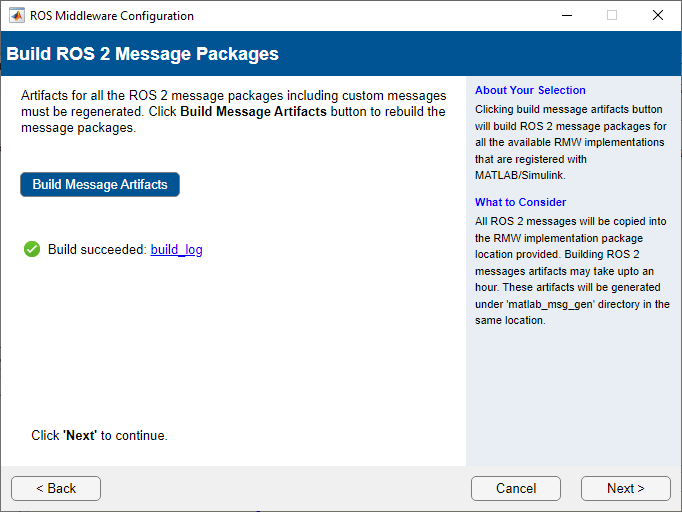
6. Test it to validate the ROS 2 node creation with the RMW implementation set to the selected option.
7. The selected ROS Middleware (RMW) Implementation is now registered as default in the dropdown menu in the ROS Toolbox Settings window. Click OK to set this RMW implementation.
Use these steps to configure RMW implementations based on other middleware as well, such as, openDDS, GurumDDS and further ones that are supported in ROS 2.

