Controlar una luz con TalkBack en ESP8266
Este ejemplo muestra cómo recuperar comandos de una cola de ThingSpeak™ TalkBack y luego usar los comandos para cambiar el estado del LED integrado.
Utilice TalkBack cuando su aplicación involucre una máquina que desee ejecutar solo cuando haya un comando en la cola.
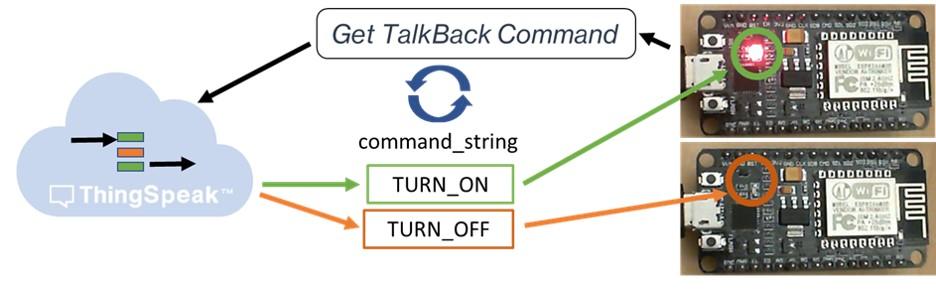
En este ejemplo, escribe TURN_ON o TURN_OFF en su cola de TalkBack y el dispositivo cambia el estado del LED integrado para que coincida con el comando. Utilice los comandos TalkBack App a través de web interface o HTTP para escribir comandos de dispositivo en una lista. Puede almacenar hasta 8000 comandos en la lista. Cada vez que el dispositivo lee la lista de comandos, lee un solo comando y lo elimina de la lista.

Hardware compatible
Dispositivos basados en ESP8266
NodoMCU
nosotros
Requisitos previos
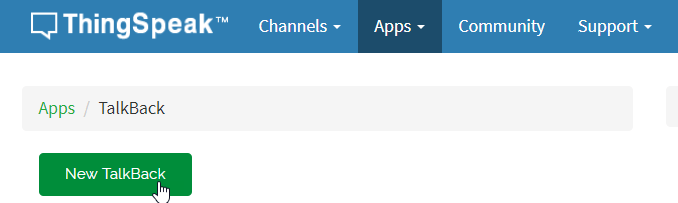
Debe tener al menos un canal configurado para completar este ejemplo. Cree un canal como se muestra en Collect Data in a New Channel y registre la clave API de escritura. También necesitas configurar un TalkBack. Ve a Aplicaciones > TalkBacks y elige Nuevo TalkBack.
Agregar comandos a la cola de TalkBack
Puedes agregar comandos a una cola de TalkBack de dos maneras.
Utilice la interfaz web de ThingSpeak TalkBack para agregar comandos a la cola de TalkBack. Puede configurar TalkBack para tener hasta 8000 comandos.
Utilice la API de ThingSpeak. Puede utilizar una solicitud HTTP POST para agregar un comando a la cola. En la siguiente POST, reemplace
TALKBACK_ID,YOUR_TALKBACK_API_KEY,TALKBACK_COMMANDyPOSITION_NUMBERcon los valores apropiados. para tu canal.
POST https://api.thingspeak.com/talkbacks/TALKBACK_ID/commands
 api_key=YOUR_TALKBACK_API_KEY
     command_string=TALKBACK_COMMAND
     position=POSITION_NUMBER
Programe su dispositivo
1) Descargue el último IDE de Arduino®.
2) Agregue el paquete de placa ESP8266.
3) En Archivo > Preferencias, ingrese https://arduino.esp8266.com/stable/package_esp8266com_index.json en URL adicionales de Board Manager.
4) Elija Tools > Boards > Board Manager. Ingrese ESP8266 en la barra de búsqueda, luego seleccione e instale el paquete.
5) En el menú Herramientas, seleccione el puerto y la placa apropiados en el IDE de Arduino. El hardware utilizado para generar este ejemplo utilizó la opción Node MCU 1.0 (ESP 8266–12E) .
6) Pegue el código en el IDE de Arduino. Agregue la información de su red, su clave API de TalkBack y su número de TalkBack.
7) Programe el dispositivo y luego observe el monitor serie y el LED para observar los cambios cuando se consumen los comandos. Cada comando que se ejecuta se elimina de la lista. Debe agregar más comandos a la lista una vez que se consuman.
Código
1) Comience incluyendo las bibliotecas apropiadas y definiendo variables. Ingrese el SSID y la contraseña de su red. Ingrese su número de canal y los parámetros de TalkBack: myTalkBackID y myTalkBackKey.
/*
WiFi
FetchCommandFromTalkBack

Description: Checks a TalkBack queue every 60 seconds and sets the state of the built-in LED according
             to the latest command fetched. Turn the LED on and off by using the commands TURN_ON and TURN_OFF.
             The TalkBack documentation can be found at https://www.mathworks.com/help/thingspeak/talkback-app.html.

Hardware: ESP8266-based boards

Copyright 2018, The MathWorks, Inc.
*/


#include <ESP8266WiFi.h>

char ssid[] = <enter your SSID>;   // your network SSID (name)
char pass[] = <enter your password>;   // your network password

WiFiClient  client;

unsigned long myTalkBackID = <enter your TalkBack ID>;
const char * myTalkBackKey = <enter your TalkBack API key>;
2) En la función setup , inicializa el LED e inicia el monitor serial.
void setup() {
  pinMode(LED_BUILTIN, OUTPUT);  // Set up LED
  Serial.begin(115200);          // Initialize serial
}
3) En el bucle principal, comience estableciendo una conexión a la red Wi-Fi local. Cree el mensaje POST con los parámetros correctos. Realice la solicitud POST, verifique el resultado y busque un comando TalkBack. Espere 60 segundos y revise la cola nuevamente.
void loop() {

  // Connect or reconnect to Wi-Fi
  if(WiFi.status() != WL_CONNECTED){
    Serial.print("Attempting to connect to SSID: ");
    Serial.println(String(ssid));
    while(WiFi.status() != WL_CONNECTED){
      WiFi.begin(ssid, pass);
      Serial.print(".");
      delay(5000);
    }
    Serial.println("\nConnected.");
  }

  // Create the TalkBack URI
  String tbURI = String("/talkbacks/") + String(myTalkBackID) + String("/commands/execute");

  // Create the message body for the POST out of the values
  String postMessage =  String("api_key=") + String(myTalkBackKey);

   // Make a string for any commands that might be in the queue
  String newCommand = String();

  // Make the POST to ThingSpeak
  int x = httpPOST(tbURI, postMessage, newCommand);
  client.stop();

  // Check the result
  if(x == 200){
    Serial.println("checking queue...");
    // Check for a command returned from TalkBack
    if(newCommand.length() != 0){

      Serial.print("  Latest command from queue: ");
      Serial.println(newCommand);

      if(newCommand == "TURN_ON"){
        digitalWrite(LED_BUILTIN, HIGH);
      }

      if(newCommand == "TURN_OFF"){
        digitalWrite(LED_BUILTIN, LOW);
      }
    }
    else{
      Serial.println("  Nothing new.");
    }

  }
  else{
    Serial.println("Problem checking queue. HTTP error code " + String(x));
  }


  delay(60000); // Wait 60 seconds to check queue again
}
4) Utilice la función httpPOST para leer el siguiente comando de TalkBack.
// General function to POST to ThingSpeak
int httpPOST(String uri, String postMessage, String &response){

  bool connectSuccess = false;
  connectSuccess = client.connect("api.thingspeak.com",80);

  if(!connectSuccess){
      return -301;
  }

  postMessage += "&headers=false";

  String Headers =  String("POST ") + uri + String(" HTTP/1.1\r\n") +
                    String("Host: api.thingspeak.com\r\n") +
                    String("Content-Type: application/x-www-form-urlencoded\r\n") +
                    String("Connection: close\r\n") +
                    String("Content-Length: ") + String(postMessage.length()) +
                    String("\r\n\r\n");

  client.print(Headers);
  client.print(postMessage);

  long startWaitForResponseAt = millis();
  while(client.available() == 0 && millis() - startWaitForResponseAt < 5000){
      delay(100);
  }

  if(client.available() == 0){
    return -304; // Didn't get server response in time
  }

  if(!client.find(const_cast<char *>("HTTP/1.1"))){
      return -303; // Couldn't parse response (didn't find HTTP/1.1)
  }

  int status = client.parseInt();
  if(status != 200){
    return status;
  }

  if(!client.find(const_cast<char *>("\n\r\n"))){
    return -303;
  }

  String tempString = String(client.readString());
  response = tempString;

  return status;

}