Deploy Semantic Segmentation Application Using TensorFlow Lite Model on Host and Raspberry Pi
This example shows how to simulate and generate code for an image segmentation application that uses a Tensorflow Lite (TFLite) model. This example uses DeepLab V3 TensorFlow Lite model from the TensorFlow™ hub. This model can segment each pixel of the input image into 21 classes, such as background, dog, and plant.
Third-Party Prerequisites
Raspberry Pi® hardware
TFLite library on the target ARM® hardware
Download Model
This example uses TFLites to run inference on a pretrained DeepLab V3 model.
Run these commands to download the DeepLab V3 model. The model file is approximately 2.7 MB in size.
if ~exist("deeplabv3/2.tflite","file")
    disp('Downloading Deeplabv3 model file...');
    url = "https://www.kaggle.com/models/tensorflow/deeplabv3/TfLite/metadata/2/download/";
    websave("deeplabv3.tar.gz",url);
    untar("deeplabv3.tar.gz","deeplabv3")
end
Downloading Deeplabv3 model file...
The Entry-Point Function
The tflite_semantic_predict entry-point function loads the DeepLab V3 model into a persistent network object using the loadTFLiteModel function. Then, the function performs prediction by passing the network object to the predict function.
type tflite_semantic_predict.mfunction output = tflite_semantic_predict(in)
% Copyright 2023-2024 The MathWorks, Inc.
persistent net;
if isempty(net)
net = loadTFLiteModel('deeplabv3/2.tflite');
end
output= net.predict(in);
end
The loadTFLiteModel function creates a TFLiteModel object. TFLiteModel object has properties that contain information about the model, such as the number and size of inputs and outputs of the model. For more information on loadTFLiteModel (Deep Learning Toolbox) and loadTFLiteModel (Deep Learning Toolbox).
net = loadTFLiteModel('deeplabv3/2.tflite');
disp(net);
TFLiteModel with properties:
ModelName: 'deeplabv3/2.tflite'
NumInputs: 1
NumOutputs: 1
InputSize: {[257 257 3]}
OutputSize: {[257 257 21]}
InputScale: 1
InputZeroPoint: 0
OutputScale: 1
OutputZeroPoint: 0
InputType: {'single'}
OutputType: {'single'}
PreserveDataFormats: 0
NumThreads: 6
Mean: 127.5000
StandardDeviation: 127.5000
Read Labels Map
Read the labels file associated with TFLite Model.
labelsFile = importdata('labelmap_segmentation.txt');Perform Semantic Segmentation by Using Simulation on Host
Load an input image and call tflite_semantic_predict on the input image.
I = imread("testMultilabelImage2.png");
I1 = imresize(I,[257 257]);
I2 = imresize(I,[1024,1280]);
imshow(I2);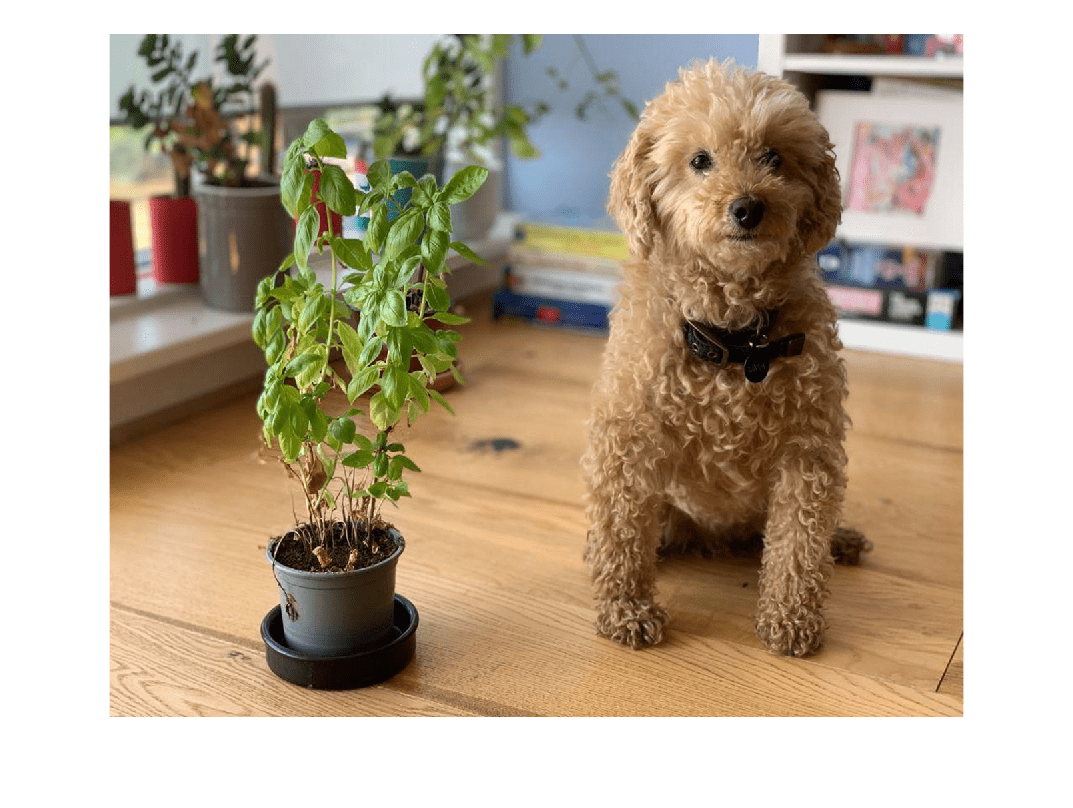
output = tflite_semantic_predict(I1);
Generate MEX for the tflite_semantic_predict Function
Use the codegen command to generate a MEX function that runs on the host platform.
Create a code configuration object for a MEX function and set the target language to C++. To generate MEX, use the codegen command and specify the input size as [257,257,3]. This value corresponds to the input layer size of the network.
cfg = coder.config('mex');
cfg.TargetLang = 'C++';
codegen -config cfg tflite_semantic_predict -args ones(257,257,3,'single')
Code generation successful.
Call tflite_semantic_predict_mex on the input image I1.
output = tflite_semantic_predict_mex(single(I1));
Generate, Deploy and Run Code on Raspberry Pi
On the Raspberry Pi hardware, set the environment variable TFLITE_PATH to the location of the TFLite library. For more information on how to build the TFLite library and set the environment variables, see Prerequisites for Deep Learning with TensorFlow Lite Models (Deep Learning Toolbox).
Set Up Connection with Raspberry Pi
Use the Raspberry Pi® Blockset function raspi to create a connection to the Raspberry Pi.
The raspi function reuses these settings from the most recent successful connection to the Raspberry Pi hardware. This example establishes an SSH connection to the Raspberry Pi hardware using the settings stored in memory.
r = raspi;
If this is the first time connecting to a Raspberry Pi board or if you want to connect to a different board, use the following line of code:
r = raspi('raspiname','username','password');
Replace raspiname with the name of your Raspberry Pi board, username with your user name, and password with your password
Copy TFLite Model to Target Hardware
Copy the TFLite model to the Raspberry Pi board. On the hardware board, set the environment variable TFLITE_MODEL_PATH to the location of the TFLite model. For more information on setting environment variables, see Prerequisites for Deep Learning with TensorFlow Lite Models (Deep Learning Toolbox).
In this command, replace targetDir with the destination folder of TFLite model on the Raspberry Pi board.
targetDir = '/home/pi';
r.putFile('deeplabv3/2.tflite',targetDir);
Generate PIL MEX Function
To generate a PIL MEX function for a specified entry-point function, create a code configuration object for a static library and set the verification mode to 'PIL'. Set the target language to C++.
cfg = coder.config('lib','ecoder',true);
cfg.TargetLang = 'C++';
cfg.VerificationMode = 'PIL';
Create a coder.hardware object for Raspberry Pi and attach it to the code generation configuration object.
hw = coder.hardware('Raspberry Pi');
cfg.Hardware = hw;
In MATLAB, run the codegen command to generate a PIL MEX function called tflite_semantic_predict_pil.
codegen -config cfg tflite_semantic_predict -args ones(257,257,3,'single')
Run Generated PIL
Run the generated PIL by passing the input image I1.
output = tflite_semantic_predict_pil(single(I1));
### Starting application: 'codegen\lib\tflite_semantic_predict\pil\tflite_semantic_predict.elf'
    To terminate execution: clear tflite_semantic_predict_pil
### Launching application tflite_semantic_predict.elf...
Display the Segmented Image
Each pixel has an associated class. Get the max indices from each channel.
[~, PredictionIndices] = max(output,[],3);
Get the class for each pixel.
classes = string(labelsFile);
ClassesForEachPixel = getClassesForEachPixel(net, PredictionIndices, classes);
disp(ClassesForEachPixel(23,45)); % Viewing classes for pixel height, width dimensions are 23,45
background
Display all the unique classes in the image.
UniqueClassesInImage = unique(ClassesForEachPixel);
disp(UniqueClassesInImage);
     background
     potted plant
     dog
Display Overlaid Image
Overlay image with labeled pixels on top of the input image.
[cmapNormalized, ~, cmap] = getColorMap();

B = labeloverlay(I1,ClassesForEachPixel,'ColorMap',cmapNormalized);
imshow(imresize(B,[1024, 1280]));
DrawPixelLabelColorbar(cmapNormalized,classes);
Display the input image and segmented image with a color bar.
SegmentedImage = getSegmentedImage(net, PredictionIndices, cmap);

figure(1);
subplot(2,2,1);
imshow(I2);
title('Original Image');
subplot(2,2,2);
imshow(imresize(SegmentedImage,[1024,1280]));
title('Segmented Image');
subplot(2,2,[3,4]);
Ibar = imread('LabelColorBar.png');
imshow(Ibar);
title('Color bar');

References
[1] Chen, Liang-Chieh, George Papandreou, Florian Schroff, and Hartwig Adam. “Rethinking Atrous Convolution for Semantic Image Segmentation.” arXiv, December 5, 2017. https://doi.org/10.48550/arXiv.1706.05587
See Also
Functions
codegen|predict(Deep Learning Toolbox) |loadTFLiteModel(Deep Learning Toolbox) |TFLiteModel(Deep Learning Toolbox)
Topics
- Prerequisites for Deep Learning with TensorFlow Lite Models (Deep Learning Toolbox)
- Generate Code for TensorFlow Lite (TFLite) Model and Deploy on Raspberry Pi (Deep Learning Toolbox)
- Deploy Super Resolution Application That Uses TensorFlow Lite (TFLite) Model on Host and Raspberry Pi (Deep Learning Toolbox)