Probe
Output block variables as signals during simulation

Libraries:
Simscape /
Utilities
Description
The Probe block lets you select variables from another block in the model and output them as Simulink® signals. Double-click a Probe block and use the Connect button to attach (bind) the Probe block to another Simscape™ block, which can be located at the same level of the model diagram, in a subsystem, or at any other level of the model hierarchy. However, the block must be located in the same model. You cannot bind the Probe block across model reference boundaries.
Once you select the block to probe, a list of its variables appears on the model canvas. You can select the variables on the model canvas, or skip this step. Click Done connecting to complete the binding process. At this point, the Probe dialog box is populated with the list of variables from the attached block. If you have selected any of the variables on the model canvas, they are selected in the dialog box as well. You can use the dialog box to continue selecting which variables to probe, customize the port names, and specify the output units.
When you select the variables to probe:
The list contains all the externally accessible block variables, regardless of whether they are exposed in the Initial Targets section of the block dialog box. Externally accessible variables include:
Component variables, including event variables
Domain Across variables at each of the nodes
Inputs
Outputs
Intermediates
Mode chart elements
These members must be declared with the
ExternalAccessattribute value of eithermodifyorobserve. Essentially, these are the same variables that you can see in the simulation data log or instrumentation table.In case of conditional visibility, if a variable is active only in a subset of block parameterizations, such a variable is always available for probing, regardless of whether it is active in the current block configuration.
In case of conditional declaration, variables are not available for probing, regardless of whether the conditional branch is active in the current block configuration. For composite components, this limitation includes all the externally accessible variables of conditionally declared components.
The block outputs each of the selected variables as a separate signal.
The Probe block outputs Simulink signals. Therefore, you can connect it directly to Simulink blocks, such as scopes or buses.
You can attach (bind) a Probe block to only one block at a time. However, you can bind multiple Probe blocks to the same block in the model at the same time.
Working with the Block on the Model Canvas
To use a Probe block in a model:
Add the Probe block to any level of the model hierarchy.
Double-click the Probe block. The block dialog box opens.
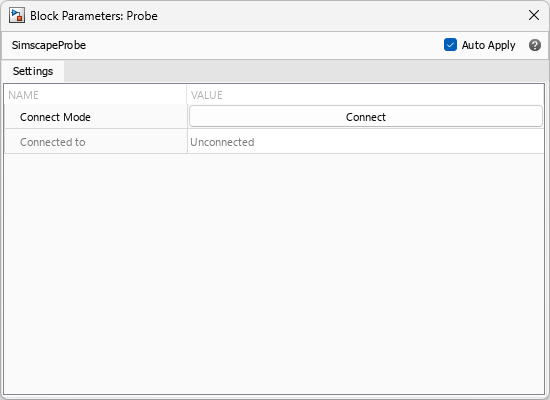
At this point, the Probe block is unconnected, that is, not attached to any other block.
Click Connect to start the binding process.
Select a Simscape block. That block can be located at any level of the model hierarchy.
When you select a block, a list of its variables appears on the model canvas. You can select the variables on the model canvas, or skip this step and select the variables later, from the Probe dialog box. The benefit of selecting variables on the model canvas is that you can filter them and select or unselect multiple variables at once.
For example, if you selected a Rotational Electromechanical Converter block, the available variables include current, voltage, torque, and angular velocity, as well as voltage at each of the electrical ports and the rotational velocity at ports C and R.

To facilitate working with long lists of variables, the context menu has a Type to Filter field at the top. Type in this field to display only the variables that contain the filter string in their name or id.
You can also use the top check box, located just below the Type to Filter field, to select all or unselect all the currently listed variables.
In the Probe block dialog box, click Done connecting next to Connect Mode to complete the binding process.
Note
When selecting a block, if you navigate across the subsystem boundaries to a subsystem that is not open in a model tab, the Probe block dialog box can close automatically. In this case, you can end the binding process by clicking the X in the upper-right corner of the model canvas.
Ending the binding process takes you to the model diagram level where the Probe block is situated and reopens the Probe dialog box.
Once you have completed the binding process, the Probe dialog box is populated with the list of variables from the attached block. The Probe dialog box also contains a link to the block to which the probe is connected. If you click this link, the block being probed is highlighted. If this block is at a different level than the Probe block, the subsystem containing the block opens and the block is highlighted.
If you have selected any of the variables on the model canvas, they are selected in the dialog box as well. (In this example, current and angular velocity are selected.) If a variable is selected in the dialog box, you can expand it in the list to view the associated port label and unit. You can use the dialog box to continue selecting which variables to probe, customize the port names, and specify the output units.
For each selected variable, the Probe block acquires an additional output port. (In this example, the port names are i and w.) Initially, the port label matches the variable name, but you can edit it by double-clicking its name in the Probe dialog box, in the cell to the right of Port Label. The default value for Unit is
inherit, which means that the output unit for the variable matches the computational unit. You can also select a specific unit from the drop-down list, which contains units commensurate with the computational unit.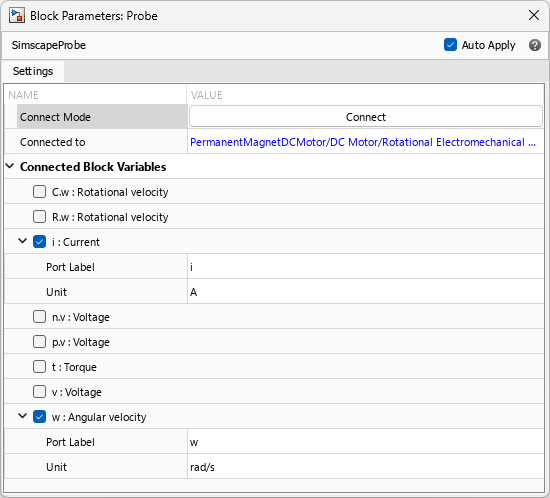
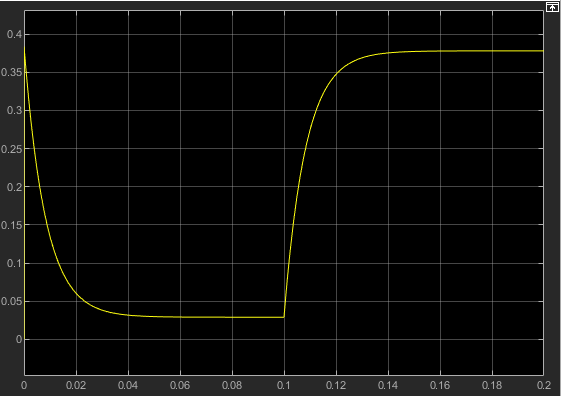
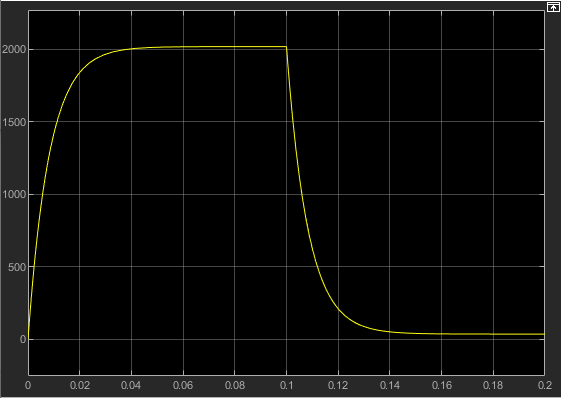
Connect the Probe block output ports to scopes or other blocks from the Simulink Sinks library to view the signal values during simulation.

To bind a Probe block to a different block in the model, or to change the selected variables, double-click the Probe block again.
If you copy a Probe block together with the block that it is bound to, the connection is preserved and the same variables are automatically selected in the new pair.
Command Line Workflow
Instead of the interactive workflow on the model canvas, you can bind a Probe block and select variables by using these commands:
simscape.probe.setBoundBlock(— BindsprobeBlock,boundBlock)probeBlocktoboundBlock.probeBlockmust be a valid full block path or a handle to a Probe block.boundBlockmust be a valid full block path or a handle to another block at the same level of the model hierarchy asprobeBlock. The command does not check whetherboundBlockis a Simscape block or whether it has variables to probe.simscape.probe.setBoundBlock(returns the Probe block to the unbound state. Does not affect the selected variables.probeBlock, [])simscape.probe.setVariables(— Selects variables for theprobeBlock,variables)probeBlockto output.probeBlockmust be a valid full block path or a handle to a Probe block.variablesmust be a character vector, cell array of character vectors, or string array that specifies the variables. The character vectors or strings must be unique variable identifiers, lexicographically sorted. The command does not check whether the currently selectedboundBlockcontains these variables.Instead of lexicographically sorting the variables, you can use this syntax:
I = simscape.probe.setVariables(probeBlock, variables, 'Sort', true)
The command then sorts the variables before applying them to
probeBlock. Variable identifiers must still be unique.Ireturns the order in which the sortedvariablesappear as ports on the Probe block.
The programmatic equivalent of the interactive binding and variable selection shown in the example in Working with the Block on the Model Canvas is:
simscape.probe.setBoundBlock('PermanentMagnetDCMotor/DC Motor/Probe','PermanentMagnetDCMotor/DC Motor/Rotational Electromechanical Converter');
simscape.probe.setVariables('PermanentMagnetDCMotor/DC Motor/Probe',["i", "w"]);
As a result, the Probe block also has two output ports, i and w, bound to the Current : i and Angular velocity : w variables of the Rotational Electromechanical Converter block, respectively.
If you supply unsorted variables, the command returns the sorted order:
I = simscape.probe.setVariables('PermanentMagnetDCMotor/DC Motor/Probe', ["w", "i"], 'Sort', true)
I =

     2     1
In this example, the second variable, i, appears as the first port on
the Probe block, followed by the first variable,
w.
You can use the
simscape.probe.getBoundBlock(
and probeBlock)simscape.probe.getVariables(
commands, where probeBlock)probeBlock is a valid full block path or a handle
to a Probe block, to return its bound block and variables,
respectively.
You can also use the simscape.probe.defaultVariableTable, simscape.probe.setVariableTable, and simscape.probe.getVariableTable functions to construct
VariableTable objects and attach them to a
Probe block.
Examples

Circuit Breaker with Probe Block
Models a circuit breaker using a Simscape Probe block to access the current and voltage within the electrical switch block and another Simscape Probe block to access the voltage across a load.
Ports
Output
Tips
You can also start the binding process by clicking the Connect button that appears over a Probe block on the model canvas.
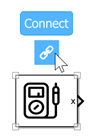
Then select the block to probe and select the variables on the model canvas the same way as described in Working with the Block on the Model Canvas. To end the binding process, click the Done Connecting button over the same Probe block or click the X in the upper-right corner of the model canvas.
If you make changes in the Probe dialog box in batch-apply mode (with the Auto Apply check box cleared), the Connect button does not become available until you click Apply or Reset at the bottom of the dialog box.