Register Images Using Registration Estimator App
R2026bThis example shows how to align a pair of images by using the Registration Estimator app. Registration Estimator offers many feature-based and intensity-based registration techniques and using the app can be an iterative process. You might try several registration techniques and different combinations of registration parameters until you achieve the results you want.
Load Images into Registration Estimator
This example demonstrates a simple case of registering a moving image that has only rotation with respect to the fixed image. Load a grayscale image as a fixed image, then create the moving image by rotating the fixed image clockwise by 30 degrees.
I = imread("cameraman.tif");
J = imrotate(I,-30);
In this example, you can open Registration Estimator from the Command Window because the images have no spatial referencing information or initial transformation estimate. Specify the moving image and the fixed image as the two input arguments.
registrationEstimator(J,I)
If your images have spatial referencing information, or if you want to specify an initial transformation estimate, then you must load the images using a dialog box. For more information, see Load Images, Spatial Referencing Information, and Initial Transformation.
You can also open Registration Estimator from the MATLAB® Toolstrip. Open the Apps tab and click Registration Estimator under Image Processing and Computer Vision. If you open the app from the toolstrip, then you must load the images using a dialog box.
Obtain Initial Registration Estimate
After you load the images, the app displays an overlay of the images and creates three registration trials: Correlation, MSER, and SURF. These trials appear as drafts in the history list.
The image overlay assists with visualizing the misalignment of the images. The default Green-Magenta overlay style shows the fixed image in green and the moving image in magenta. The overlay looks gray in areas where the two images have similar intensity. When you select a draft of a feature-based technique in the history list, the image overlay also displays a set of red and green dots connected by yellow lines. These points are the matched features used to align the images.
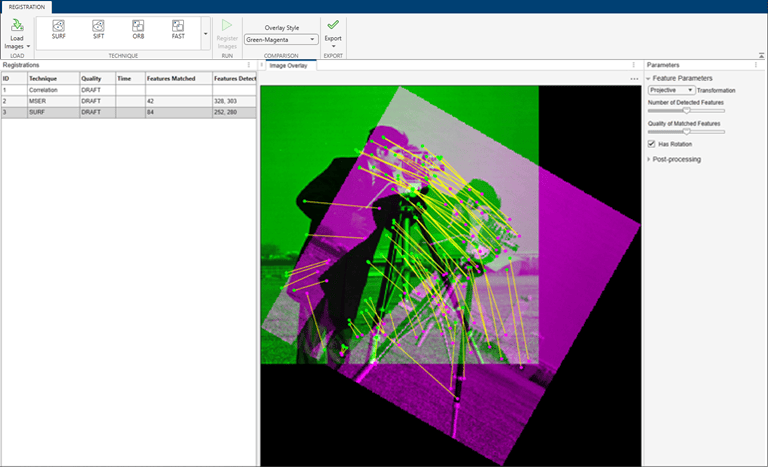
Run the three registration trials with the default settings. Click each trial in the history list, then click Register Images.
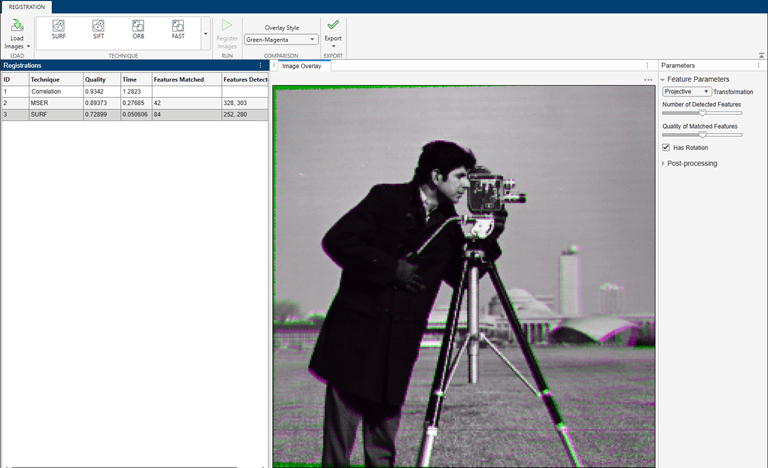
After the registration finishes, the trial displays a quality score and computation time. The quality score loosely approximates the ssim function and provides an overall estimate of registration quality. A score closer to 1 indicates a higher quality registration. Different registration techniques and settings can yield similar quality scores but show error in different regions of the image. Due to randomness in the registration optimizer, the quality score, registered image, and geometric transformation can vary slightly between trials despite identical registration settings.
Inspect the quality scores and image overlays to confirm which registration technique is the most acceptable. Colors in an image overlay indicate residual misalignment.
Explore Other Registration Techniques
To create a trial for a different registration technique, select a technique from the Technique menu.
The scene in this example does not have many sharp corners, so choose a blob detector such as SIFT. The app creates a new trial and displays a preview of the matched features.
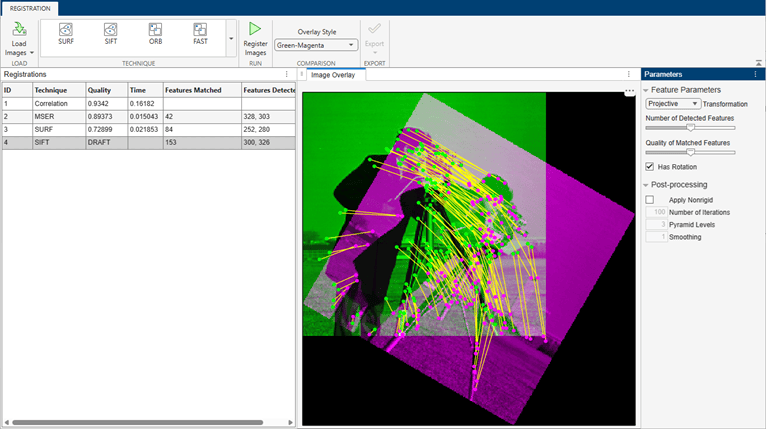
Run the SIFT registration trial by clicking Register Images.
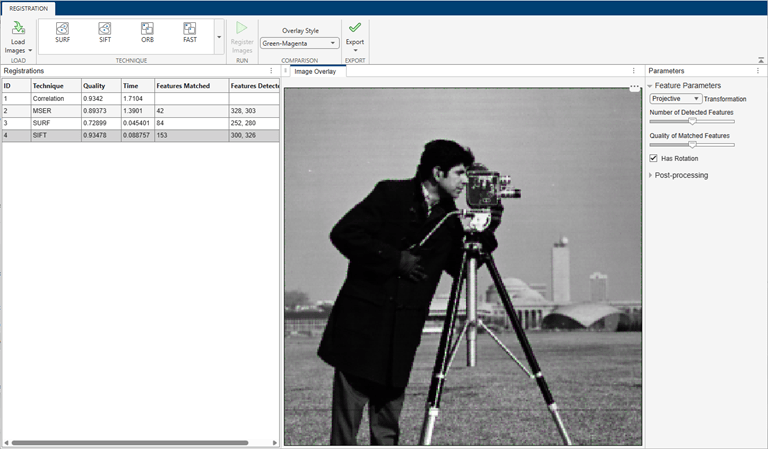
The quality score is the largest of the four trials. The image overlay is mostly gray, which confirms that the SIFT registration technique yields better alignment than the previous registration techniques.
Refine Registration Settings
After you have an initial registration estimate, you can attempt to improve the quality of the registration by tuning the registration settings. For more information on available settings for all registration techniques, see Tune Registration Settings in Registration Estimator.
Because the SIFT trial has a comparable quality score to the Correlation trial and runs faster than the Correlation trial, tune the registration settings of the SIFT trial. When you change any setting in the Parameters panel, Registration Estimator creates a new trial in the Registrations list, and assigns an ID based on the ID of the original trial.
Select Geometric Transformation Type
All feature-based and intensity-based registration techniques support setting the type of geometric transformation. If you know the conditions under which the images were obtained, then selecting the appropriate geometric transformation type results in a registration that more accurately represents the scene geometry. A transformation with more degrees of freedom than required by the scene geometry might have a larger quality score than a properly constrained geometric transformation due to overfitting.
Because the images in this example differ only by rotation, constrain the registration to a rigid transformation. Select the SIFT trial in the Registrations panel, then select the Rigid transformation type in the Transformation dropdown.
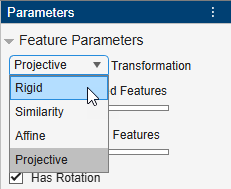
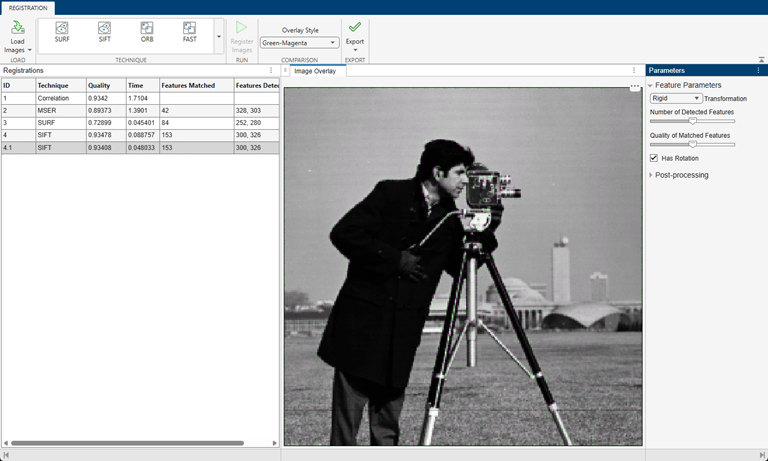
Registration Estimator creates a new trial, numbered 4.1, in the Registrations list. Run the new registration trial by clicking Register Images. The quality score of the rigid transformation is smaller than the quality score of the projective transformation, but the rigid transformation is more appropriate for these images.
Increase Number of Detected Features and Quality of Matched Features
Adjust the settings of the SIFT trial with the rigid transformation. First, try increasing the number of detected features and the quality of matched features independently to see if either improves the quality of the registration.
To increase the number of detected features, click the SIFT trial numbered 4.1 in the Registrations list. In the Parameters panel, drag the Number of Detected Features slider to the right. When you change the setting, the app creates a new trial, numbered 4.1.1, in the history list. The app preserves the value of the geometric transformation, and other parameters, from the original trial. For the draft of the new trial, the image overlay shows more matched features, as expected.
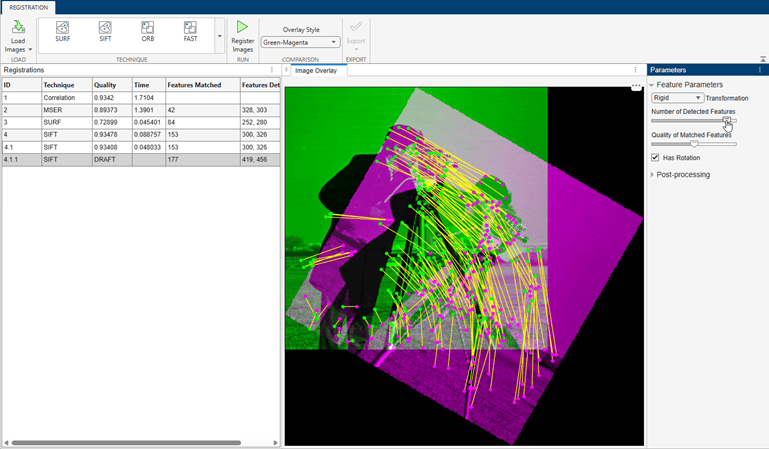
Run the new registration trial by clicking Register Images. For this number of matched features, the quality score is smaller than the quality score of the other SIFT trials. Therefore, increasing the number of detected features does not necessarily improve the quality of the registration. The impact of changing the number of detected features depends heavily on the content of the scene.
To see the effect of increasing the quality of matched features using the default value of the Number of Detected Features parameter, click the SIFT trial numbered 4.1 in the Registrations list. In the Parameters panel, drag the Quality of Matched Features slider to the right. When you change the setting, the app creates a new trial, numbered 4.1.2, in the history list. The image overlay displays a smaller number of high quality matched points.
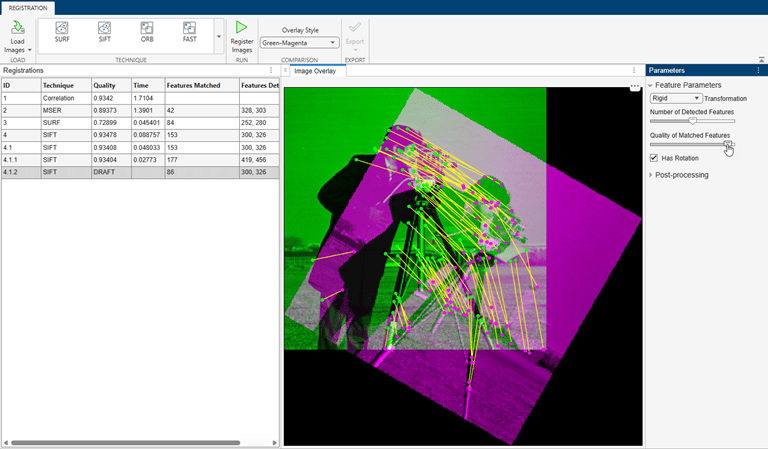
Run the new registration trial by clicking Register Images. The quality score is smaller than the quality score of other SIFT trials. Again, increasing the quality of matched features does not necessarily improve the quality of the registration, and the impact of changing the number of matched features depends heavily on the content of the scene.
Iterate with Different Combinations of Registration Parameters
Of the three SIFT trials that use a rigid transformation, trial 4.1 has the best quality score and a subjectively good alignment. If these results are satisfactory, then you can export the registration results for trial 4.1. However, if you want to search for an even better alignment, then you can try additional techniques and iterate with different combinations of registration parameters.
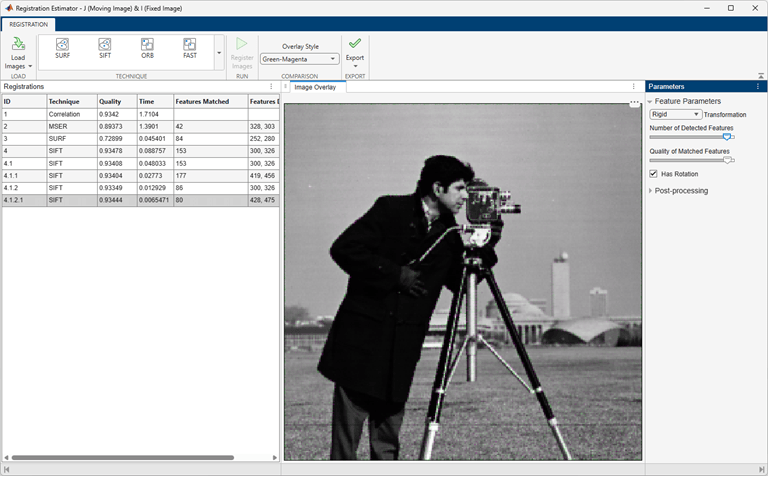
For one last iteration, start with trial 4.1.2 and increase the number of detected features. When you run the new registration trial, the quality score is the largest of the SIFT trials that use a rigid transformation.
Export Registration Results
When you find an acceptable registration, export the registered image and the geometric transformation to the workspace. You can use the registration results to apply a similar registration to multiple frames in an image sequence. For more information, see Export Results from Registration Estimator App.
This example exports trial 4.1.2.1 because it has the best quality score and no severe regions of misalignment. Click trial 4.1.2.1 in the Registrations list, then click Export and select Export Images. In the Export to Workspace dialog box, assign a name to the registration output. The output is a structure that contains the final registered image and the rigid geometric transformation.