Import Custom Code Using the Simulink Code Importer Wizard
This example uses C code for a heat pump controller to show how to use the Simulink® Code Importer wizard to import custom C/C++ code into a Simulink library. The example also shows how to perform the equivalent actions using the Simulink Code Importer command-line interface in MATLAB®. For more information, see Create Block Library from C/C++ Code.
Heat Pump Controller Custom Code
These C code source and header files contain the complete code for the heat pump controller.
The source files are in the src directory:
tempController.cutils.c
The header files are in the include directory:
tempController.hutils.hcontrollerTypes.h
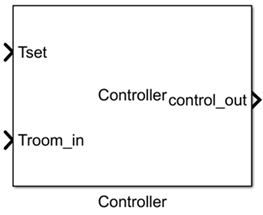
The file tempController.c contains the algorithm for the custom C code for a heat pump unit. The Controller function in that file uses the room temperature (Troom_in) and the set temperature (Tset) as inputs. The output is a pump_control_bus type structure with signals that control the fan, the heat pump, and the direction of the heat pump (heat or cool). The pump_control_bus structure has these fields: fan_cmd, pump_cmd, and pump_dir. The pump_control_bus structure type is defined in the file controllerTypes.h.
This table summarizes the output of the Controller algorithm.
The Controller function uses two utility functions, absoluteTempDifference and pumpDirection, which are defined in the utils.c file. The absoluteTempDifference function returns the absolute difference between Tset and Troom_in as a double. The pumpDirection function returns one of these PumpDirection type enum values.
The PumpDirection enum type is defined in the file controllerTypes.h.
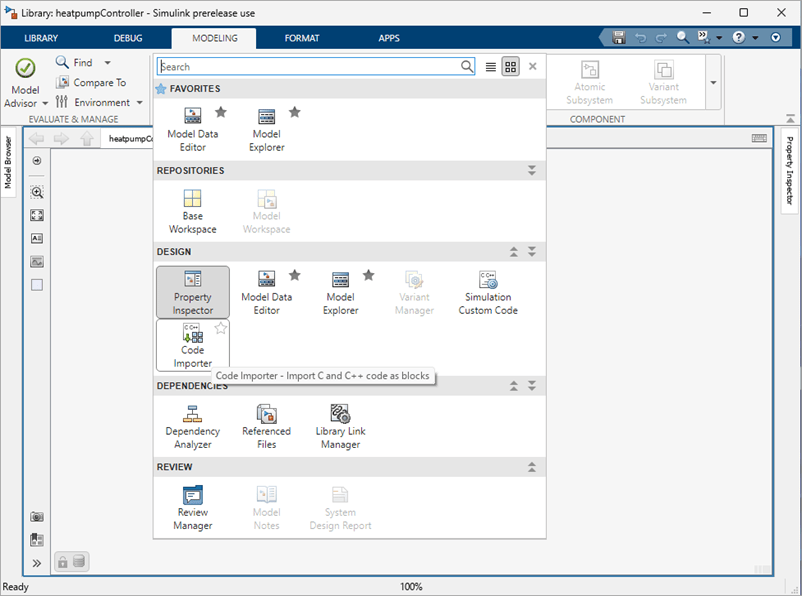
Open the Code Importer Wizard
To open the Code Importer wizard, create an empty Simulink library where the src and include folders are located and save it. For this example, the library is saved as heatpumpController.
Then, on the Modeling tab, select Design > Code Importer.
Specify the Simulink Library
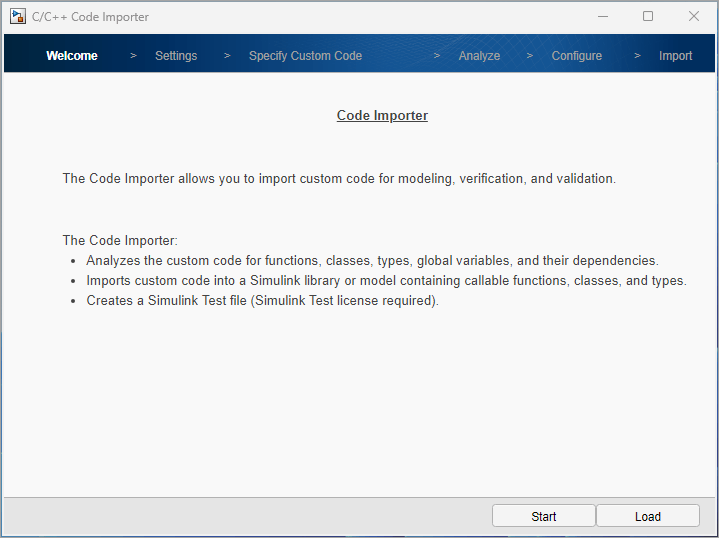
Once the Welcome page loads, click Start to begin the import process.
On the Settings page:
The Library or model name field is auto-populated with the saved library name, in this case,
heatpumpController.The Output folder is auto-populated with location of the saved Simulink library.
Optionally, select Add generated library to the Simulink Library Browser to create an slblocks.m file.
The slblocks.m file is used to add the generated library into the Simulink library browser. For more information, see Add Libraries to Library Browser and Quick Insert.
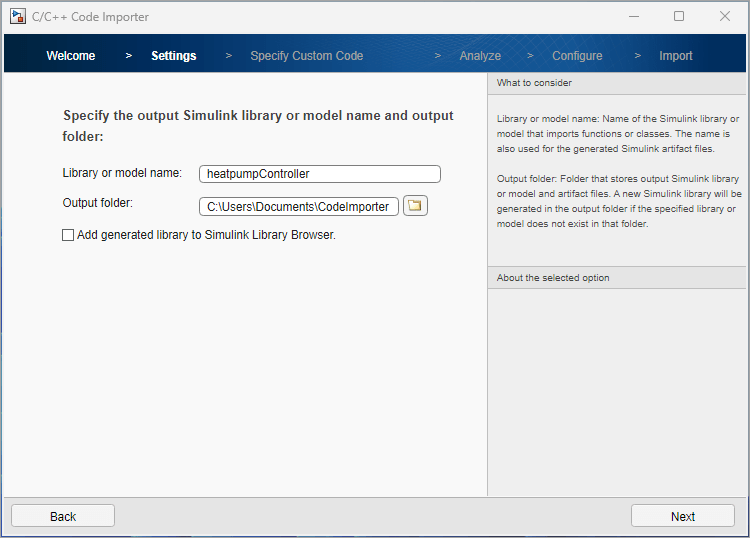
Click Next to continue.
Note: The following MATLAB code is equivalent to this step.
obj = Simulink.CodeImporter('heatpumpController');
obj.LibraryFileName = 'heatpumpController';
obj.OutputFolder = '$pwd$'; %This evaluates to the pwd
Specify the Custom Code to Import
On the Specify Custom Code page:
For Language, select
C.For Interface headers, specify the required header files. For this example, specify
tempController.h.For Source files, specify the required source files. For this example, specify the
tempController.candutils.cfiles location in thesrcfolder as.\src\tempController.c; .\src\utils.c.For Include directories, specify the required include directories. For this example, specify
.\include.
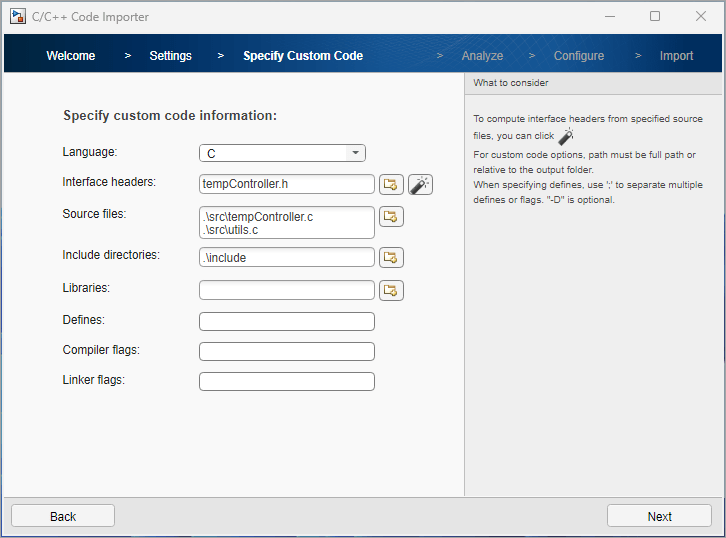
Then, click Next.
Click Next on the Analyze page.
Note: The following code is equivalent to this step.
% The src and include directories should be located in pwd
obj.CustomCode.InterfaceHeaders = 'tempController.h';
obj.CustomCode.Language = 'C';
obj.CustomCode.SourceFiles = {'.\src\tempController.c', '.\src\utils.c'};
obj.CustomCode.IncludePaths = '.\include';

% Analyze the specified custom code
obj.parse();
Specify Import Settings
Specify Functions to Import
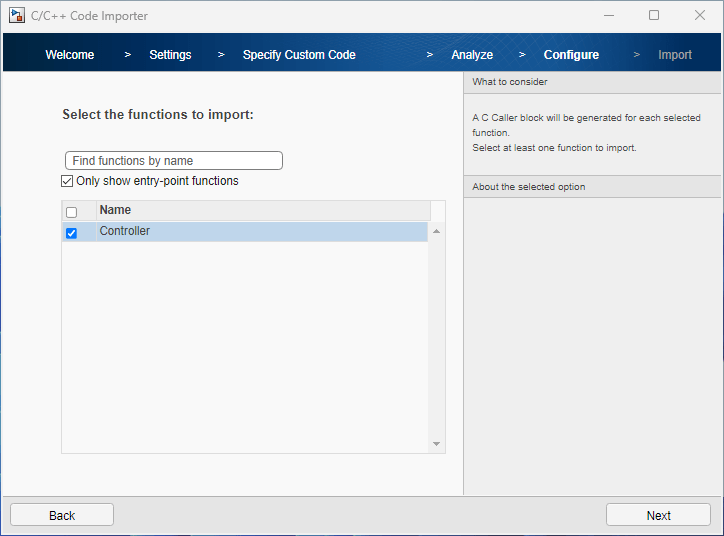
On the Configure page, select the functions to import into the Simulink library. For this example, select Controller. Then, click Next.
Set the Block Port Specifications
For each function selected on the previous page, the wizard generates a function port specification. The selected ports are used for the generated C Caller block.
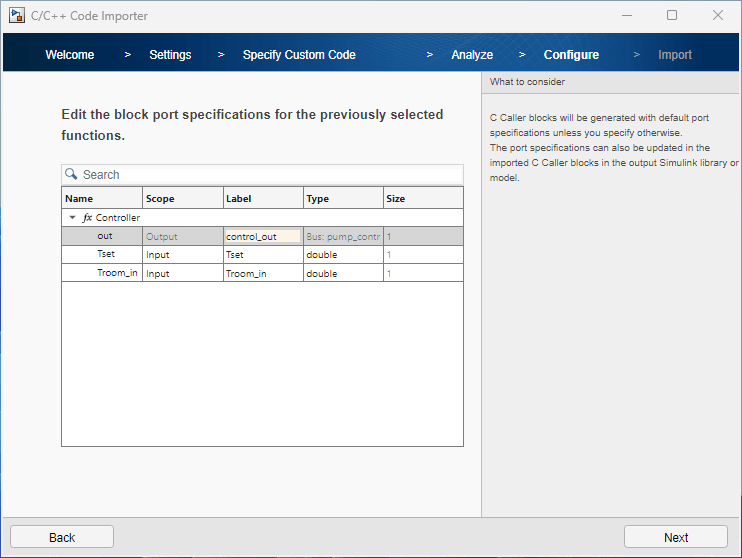
In this example, the port specification table lists the formal arguments Tset, Troom_in, and out for the Controller function.
Change the label of the out argument to control_out. Click Next.
Note: The following code is equivalent to this step.
% Requires a successful obj.parse() to get the function objects
fcnObj = obj.ParseInfo.getFunctions();

%fcnObj =
%
%  Function with properties:
%
%                 Name: "Controller"
%           CPrototype: "pump_control_bus Controller(real_T Tset, real_T Troom_in);"
%    PortSpecification: [1×1 Simulink.CodeImporter.SimulinkPortSpecification]
%              IsEntry: 1
%            IsDefined: 1
%               IsStub: 0
%          ArrayLayout: NotSpecified
%      IsDeterministic: 0

fcnObj.PortSpecification.ReturnArgument.Label = 'control_out';
Specify Types to Import
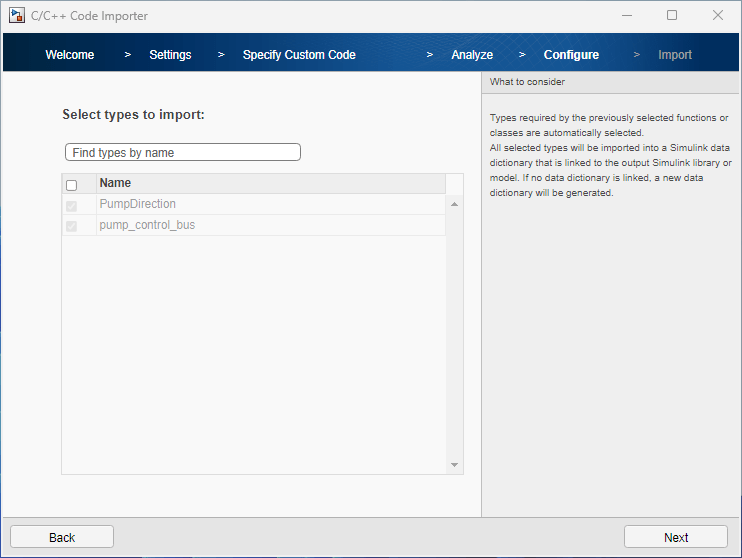
Next, select the types to import into Simulink. If a type is required by the functions you selected for import, it is selected and dimmed. For this example, pump_control_bus and PumpDirection are required. The wizard creates a Simulink data dictionary containing this type and links the dictionary to the generated library.
Click Next.
Specify Library Update Setting
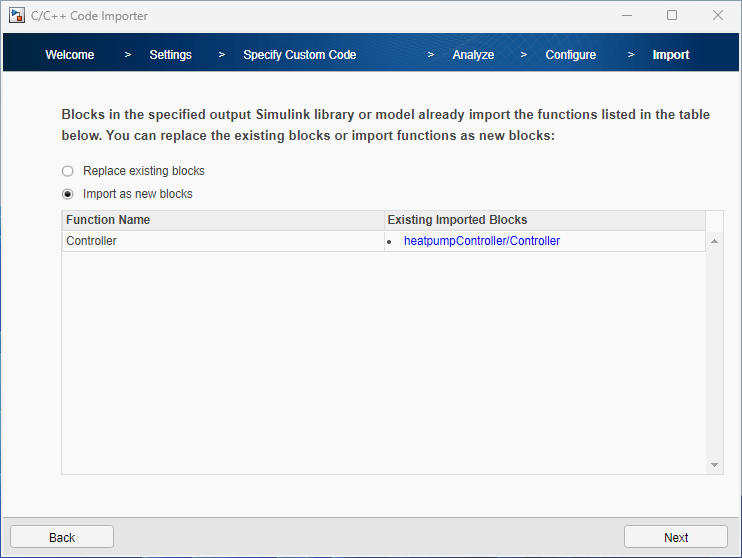
This option is not available if you are importing the Controller function to the heatpumpController library for the first time. This is available only if you have imported the Controller function to the heatpumpController library at least once before. In such a scenario, this page allows you to confirm the update operation to be performed on the library.
Select Replace existing blocks to replace the existing blocks with the new C Caller blocks for the selected custom code functions.
Select Import as new blocks to preserve the existing blocks and add a new C Caller block for the selected custom code functions.
For this example, select Import as new blocks, then click Next.
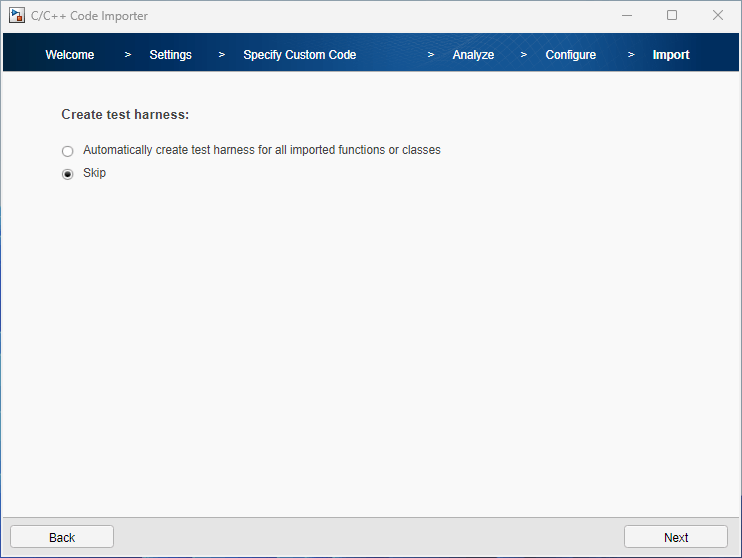
Create Test Harness
This option is available only if you have a Simulink Test™ license.
To test the imported custom code function using Simulink Test Manager, select Automatically create test harness for all imported functions or classes. Each block in the created library will be attached to an internal test harness.
For this example, select Skip. Click Next to generate the Simulink library.
After the code imports, the wizard creates a library attached to a Simulink data dictionary that defines pump_control_bus as a Simulink.Bus object.
Note: The following code is equivalent to this step.
% Requires Simulink Test license to generate the test harness
obj.Options.CreateTestHarness = true;
obj.import('Functions', 'Controller', ...
           'Types', 'pump_control_bus', ...
           'Overwrite', 'off');
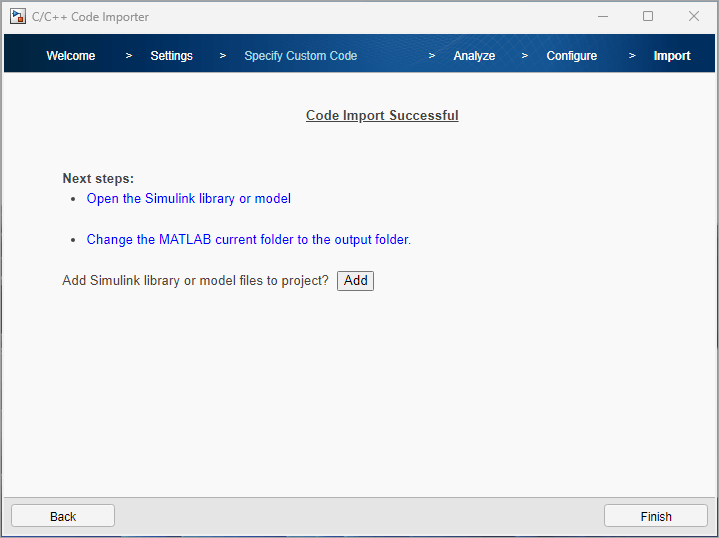
If you have an existing project file (PRJ file), you can select Add, select the desired project file, and add the generated file to that project.
Click Finish to close the wizard.
When you click Finish, select whether to save the current import settings to a JSON file. You can use this file to load the Code Importer wizard with the current import settings.
See Also
Integrate C Code Using C Caller Blocks | C Caller | Add Libraries to Library Browser and Quick Insert | Create Block Library from C/C++ Code